13 October 2010

Week 39 - Christmas Cake

Hello, how are we all? So bad news out of the way first, I didn't win the Brownie Bake Off :-( Lets get straight on to happier news from cake towers!!

You may remember a couple of months back I told you I'd joined a gym to try & counteract all the cake I was scoffing as a result of this challenge. Well it was a 6 week trial & in true me style I got bored & have decided not to join up full time, so that leaves a big exercise shaped hole in my week. You might not know this, but as well as being an amateur baker & fluffy marketer, I'm also a tap dancer & go to a class once a week! Inspired by Strictly starting again I decided I'd have a go at a new dance class. I say dance, it's aerobics really, but takes it's moves from a number of different dance styles & it's the new 'thing' to do apparently. It's ZUMBA & quite honestly it's bonkers! You really have to leave your self consciousness at the door & are encouraged to shake what your Mama gave you as much as possible (sadly mine shakes in different directions at the same time!) It's a brilliant work out & a lot of fun, I've never laughed so much through a class before, I'll definitely be going back. I hope I won't get bored of it, I'm starting to run short of exercise options!

Now you may look at the title of this weeks post & think, give over, it's only October I can't possibly think about Christmas yet? But it's exactly the right time to make the cake, especially if you're like me & want it to marinade in brandy for the next 10 weeks. This is a bit of a tradition in the Hodgson household & usually comes with a ABV rating!  The recipe is taken from an old Good Housekeeping cook book that has been in the family for years.
225g currants
225g sultanas
225g raisins
100g mixed peel
100g glace cherries chopped
50g flaked almonds
225g plain flour
1tsp mixed spice
225g butter
225g soft brown sugar
Grated rind of a lemon
4 eggs, beaten
2tbsps brandy

1. Cream the butter, sugar & lemon rind until light & fluffy, then add the eggs a little at a time, beating as you go. Fold in flour, spice & brandy, finally mix in the fruit & nuts.

2. Cut out a piece of baking paper to line the bottom of the tin, then cut another piece that will fit around the inside of the tin. Pour the mixture into the prepared tin & bake in the oven at 150c/GM3 for 3 3/4 - 4 hours. To stop the top over browning I cover it with a piece of baking paper after about an hour and a half.

3. When cooked, lift it out & leave to cool completely in the tin. I leave mine in the baking paper & store it in an airtight tin. About a week later, poke holes in the top of the cake using a skewer, then drizzle a tablespoon of brandy over the top. Repeat once a week (or as often as you like!) until Christmas.

I usually decorate my cake the week before Christmas, so I'll keep you posted about my decoration of choice this year. Enjoy your week, I'll be back with a treat I'm creating for my best friends birthday...it's set to be a challenge for me! Till then, Rebecca x

6 October 2010

Week 38 - Lemon Drizzle Cake

Evening! It's been a busy week this week with lots to tell you, but first I'd like to say thanks to those of you who shared your Victoria Sponge secrets. It really was the most pathetic excuse for a cake, but I think I've picked up a good few tips & will be testing them out in the coming weeks. I'll let you know how I get on...

So as well as the weekly recipe, I've also been practising for the Great Brownie Bake Off this Saturday. I've just about perfected the recipe so bring on the competition! You can find more details about the event here If you're in the area come along, it looks like a great line up of demonstrations from various bakers as well as appearance by Edd, winner of the Great British Bake Off. Fingers crossed, results next week.

Thanks to everyone who voted in my poll last week, it was a bit of a contest between Peanut Butter Cookies & Lemon Drizzle Cake, poor old Carrot Cake didn't seem to get a look in! Lemon Drizzle won, so here's my take on the tea time classic. This week I was kindly sent a selection of products from Total Greek Yoghurt to experiment with in my baking. I have used yoghurt before in muffins & it really does give a delicious soft texture. So I thought I'd try adding it to a Lemon Drizzle Cake, it's the perfect addition to ensure a squidgy, gooey cake...for me, exactly what Lemon Drizzle should be!

300g plain flour
200g caster sugar
170g butter melted
250ml Total Greek Yoghurt
2 eggs
1 heaped tsp baking powder
1 tsp bicarbonate of soda
2 lemons zested & juiced
100g granulated sugar

1. Beat together the sugar & eggs, add the melted butter, yoghurt & lemon zest. Finally stir in the flour, baking powder & bicarb.

2. Pour into a baking tin & bake at 180c/GM5 for around 45-55 minutes until well risen & golden on the top. Leave to cool for 10 minutes in the tin, then lift out onto a rack.

3. To make the drizzle, mix together the lemon juice & granulated sugar. Once cooled, using a skewer poke small holes into the top of the cake, then pour over the drizzle. This doesn't have to be exact as it will all seep through the cake. Leave it to set & you should have a gorgeous sugar crust on the top!

So there you have it, delicious Lemon Drizzle Cake & as its got yoghurt in it, we can kid ourselves it's healthy. I'll be trying out a few other things with the yoghurt including a dessert my Kiwi colleague recommended called Ambrosia (no not custard), which looks like a variation on an Eton Mess! Enjoy, till next week, Rebecca x

29 September 2010

Week 37 - Victoria Sponge (attempt 1!)

Hello! I'm so excited, after weeks of procrastinating & deliberating over colours I am now the proud owner of a shiny new Kitchen Aid mixer! It's an absolute lump of a thing, but it's soooo pretty. I think it's going to take a bit of trial & error to get the best out of it, it's a bit different from my battered old food processor. I love having such an icon in my kitchen, makes me feel like a proper grown up! The next big decision was what to make this week to christen it? I settled on a classic Victoria Sponge cake which to be honest I've never had much success with in the past. I thought I'd see if the Kitchen Aid helped me any, short answer...it didn't!

I'm not really quite sure where I'm going wrong? The mixture did seem a little lumpy, but it rose quite well (but dropped back just as quickly!) The texture is moist, but it was a little on the heavy side. If anyone has any tips on making the perfect Victoria Sponge I'd love to hear them. I will be practising, I want to get to the ultimate cake by week 52! Don't worry it won't just be the same recipe for the next 15 weeks, that would get a bit boring eh? But I'll keep you updated on my progress.

For the cake
100g butter
100g caster sugar
2 eggs
100g self raising flour

For the filling
75g butter
175g icing sugar
3tbsp strawberry jam

1. Cream the butter & sugar until light & fluffy, then beat in the eggs one at a time. Finally fold in the flour.

2. Grease a cake pan & pour in the mixture, spreading it evenly. Bake in the oven at 190c/GM5 for around 20 minutes. Leave to cool on a rack.

3. Cream together the butter & icing sugar to make the butter cream filling. Using a bread knife, cut the cake through the middle, then sandwich the two halves together with the butter cream & jam.

I think I could have split the mixture between 2 tins, maybe I'll try that next time? Granted it's not the most attractive looking cake (not as pretty as the Kitchen Aid!!), but I have to say it tasted good. Just need to improve on the light & fluffiness!

You may have noticed a new feature on the blog, a poll for you dear readers! I'd like you to choose next weeks recipe for me, I've chosen 3 recipes that I haven't yet got round to baking, just vote for your favourite & that's what I'll make next week, simples! Enjoy, Rebecca x


My new baby!

22 September 2010

Week 36 - Fruit Bread

Phew, I'm back from my European tour of the Douwe Egberts offices! It's been an interesting month, I've learnt far more than I ever thought I would about coffee, however I'm really looking forward to having some more time to concentrate on my baking. Apologies, I feel like I've neglected you over the last few weeks & I don't think things have been up to my usual standard. That's probably because I've taken to baking at all hours & I've realised 1am is not my finest hour for creating recipes!

Did you watch the final of the Great British Bake off last night? I don't know how they came to a decision between the final 3, they were so close! I would have been happy whoever won, I kept changing my mind every time they presented another delicious baked goodie. I think my favourite from the final was Ruth's Mint, Ginger & Blackberry cakes, they looked so gorgeous. Just reinforced the fact that I need to go on a cake decorating course to make mine look a little prettier! There's talk of another series for next year...hmm, maybe?? In the meantime I've signed up for the Great Brownie Bake Off that's being hosted by The Chocolate Consultancy on October 9th, so I'll be spending the next 3 weeks perfecting my brownies!

This week, having more time, I decided to have a go at making bread. I've always cheated & used my bread maker, but thats now been banished to the back of the cupboard to make space in my kitchen for my new coffee machine. It was pretty simple to make actually, you just need patience, checking the airing cupboard every 10 minutes to see how it's doing is probably not ideal! I decided to go for a rich fruit bread that I could either eat for breakfast or afternoon tea.

250g strong white bread flour
35g butter melted
35g caster sugar
1/2 tsp salt
7g sachet dried yeast
1 egg beaten
1 tsp ground cinnamon
35g sultanas
30g mixed peel
75ml milk mixed with 75ml water
Zest of 1 orange & 1 lemon (plus a little squeeze of lemon juice

1. Put the flour, sugar, salt, yeast, butter & egg into a large bowl. Add the liquid a little at a time, once it's all combined, stir for at least 3 minutes. Tip out the dough onto a surface dusted with flour & knead for a further 5 minutes. Add a little more flour if needed to get a smooth elastic dough. Pop it back in the bowl & leave to rise for 1.5 hours.


2. Mix the fruit, spice & zest together in a bowl. Tip out the dough back onto the board & combine the fruit mixture into the dough. Shape it into a sausage & place it on a baking tray lined with parchment. Leave to rise for another hour.


3. Bake in the oven at 220c/GM7 for 20 minutes until golden brown. Lift out & leave to cool on a rack.

I'm so chuffed with my first from scratch loaf of bread. It's delicious sliced, toasted & smothered in butter, I can highly recommend it! Have a good week everyone, see you next week, Rebecca x

p.s. has anyone else made their Christmas cake yet? I'm starting to stress it's nearly October & I haven't made mine yet...I'm losing valuable alcohol soaking time!!

15 September 2010

Week 35 - Mars Bar Cupcakes

Evening! I'm back from Belgium just long enough to rustle up this weeks recipe. I also bring good news! You may remember a while back I created a recipe for Malteser Cookies for a competition that was being run by MyDish. Well sadly I didn't win, so no shiny new Kitchen Aid mixer for me, but I was a runner up! That means I have a parcel of chocolate goodies heading my way...as if I didn't have enough calories to deal with every week :-) Here's the link to the original post, it's a dead simple recipe to make, so why not have a go yourself?


You may have noticed that this week is National Cupcake Week (it's also Scottish Food Fortnight & Organic Food Fortnight!), so it only seemed right to make some sort of cupcake. Sweeties have often been a source of inspiration for recipes so this week I'm paying homage to the good old Mars Bar. I found them great to bake with, the nougat bit stays soft, but the caramel turns into lovely chewy toffee. Yum!


For the cakes
60g butter
100g caster sugar
1 egg
Few drops of vanilla essence
300g plain flour
1tsp baking powder
1tsp bicarbonate of soda
100-150ml milk
2 Mars Bar Duo's chopped into small chunks

For the topping
80g plain chocolate
2tbsp icing sugar
Dash of milk
1 bag Mars Planets

1. Melt the butter, stir in the sugar, then beat in the egg. Fold in the flour, then add the milk a little at a time until you get a dropping consistency. Finally stir in the chopped up Mars Bars.

2. Line a 12 hole bun tin with paper cases & spoon in the mixture. I made 18 cakes, so had to bake 2 batches. Bake in the oven at 180c/GM5 for around 10-12 minutes. Lift out, leave to cool for a minute, then transfer to a rack.

3. To make the topping melt the chocolate, then stir in the icing sugar adding a little milk to make it smooth. Drizzle over the top of each cake, then top it off with a Mars Planet sweet.

Hope you enjoy what's left of National Cupcake Week, it's a good excuse to eat cake I guess! I'm off to Holland again next week & will be on a mission to get a traditional recipe for Dutch Apple Cake from one of my colleagues. Till next week, Happy Baking, Rebecca x

7 September 2010

Week 34 - Rhubarb & Orange Crumble Cake

Hello! Sorry this is going to be a bit of a short post this week. I'm on a bit of a European tour with work this month & as much as I could ramble on about coffee & my numerous trips to Belgium & Holland, I'm going to just keep it all about the cake!

So last week I mentioned that my good friend had been inspired to bake up a feast over the bank holiday weekend. One of the cakes she made was so delicious, I promised I would make it this week. The recipe came from an old Good Housekeeping recipe book & is made with rhubarb from her own garden (which I think makes it taste even better!) Anne gave me a good tip for preparing the rhubarb so it keeps its shape & doesn't go too mushy. Wash it & cut it into chunks, place it on a baking tray, add a little water, then pop it in the oven on 180c/GM4 for around 15 minutes. Lift it out & leave it cool, then drain off the excess water. Then it's ready to use.

For the cake
125g butter
125g caster sugar
125g self raising flour
2 eggs
Finely grated rind of 1 orange
200g rhubarb (prepared as above)

For the crumble
60g butter
125g plain flour
2 tbsp sugar
1/2 tsp cinnamon

1. Cream together the butter & sugar, gradually beat in the eggs until light & fluffy. Fold in the flour & orange rind. Pour the mixture into a loose bottom cake tin, then spread the prepared rhubarb over the top.

2. To make the crumble rub together the butter & flour until you have something that looks like fine breadcrumbs, then stir in the sugar & cinnamon. Spread the crumble over the top of the rhubarb.

3. Bake in the oven at 190c/GM5 for around 45-50 minutes until the crumble has just started to brown. Lift out & leave to cool before lifting out of the tin.

I served this as a dessert, warm, with a good dollop of cream. It would probably work just as well with custard, or cold with a cup of tea! It's hard to believe I've only got 18 weeks left to go in my baking challenge, the weeks are whizzing by! I hope you're still enjoying all the cakes? Thanks for all your comments, I love hearing from you! Have a good week, I'm off to unpack, then pack again. Take care, Rebecca x

1 September 2010

Week 33 - Oaty Cookies

Hello cookie monsters, here we are for another week of cakiness from the house of Rebecca Bakes Cakes. I hope you all enjoyed the bank holiday weekend, slightly upsetting to think that's it for holidays until Christmas :-( I had a cake filled weekend (even more so than usual!) I went to Cake Britain at The Futures gallery in London, it was organised by the Mad Artist Tea Party & featured an amazing collection of sculptures made entirely out of cake! I've put a few piccies of my favourites at the bottom of the post. It's also made me realise that it's time I prettied my cakes up a bit, so I've been inspired to sign up to a cake decorating class. Need to start researching, but if anyone can recommend one in the Berkshire area, let me know.

The second part of my cake weekend involved an afternoon invite over to my best friends house, with the instruction 'make sure you have an appetite!' I arrived to find Anne had been baking like a mad women, making millionaires shortbread, spiced apple cake & a.n. other cake, that I'm keeping under wraps as I'm going to make it next week! They were all delicious & I must admit it was really nice to be the one being baked for for a change. So just goes to prove, there's a domestic goddess in all of us, just need to find a way to let her out. Good work Anne, you've set your standards high! x

So this weeks recipe is one of my favourites & I've always called them Oaty Cookies, but I took some round to my mum & she described them as rock cakey thingies! I suppose they are a bit like rock cakes, a bit like a flapjack & crispy on the edges so a bit like a cookie. Essentially they don't know what they are really, I think I've created my first cake with an identity crisis! Well whatever they are, they taste delicious...

125g butter
200g caster sugar or demerera sugar for extra crunch!
1 egg
1 tsp vanilla
100g plain flour
1/4 tsp baking powder
1/4 tsp bicarbonate of soda
175g oats
80g sultanas or raisins

1. Cream together the butter & sugar, then beat in the egg & vanilla. Stir in the flour, bicarb & baking powder. Finally stir in the oats & fruit.

2. Place small dollops of mixture onto a baking tray, leaving space for them to spread. Bake in the oven at 180c/GM5 for around 8 - 10 minutes until golden brown. Leave on the tray to set for a few minutes then transfer to a rack to cool.

Hope you enjoy them! Final thing from me this week is to announce the winner of my blog giveaway, the random number generator selected

The Mad House

as my lucky winner, so congratulations, I hope you enjoy the coffee! Thanks to everyone who entered, I loved reading about your favourite cakes, given me a bit of inspiration for weeks to come. Hopefully I'll be able to run another giveaway soon, need to sweet talk another colleague into donating a prize! Enjoy your week, I'm off to Holland for a few days so bring on the waffles...or is that Belgium? Oh I don't know....ta ta, Rebecca x

24 August 2010

Week 32 - Banana Cinnamon Cupcakes

Hey there! So last weeks recipe...it created quite a bit of debate & I'll be honest it's probably the first week in my baking marathon that I've found it difficult to share the cake! Lets put it down to experience & not mention it again :-)

Have you been bitten by the Great British Bake Off bug yet? I've been watching it, going green with envy, not just about all the fab challenges they get to tackle, but also the rainbow selection of Kitchen Aid mixers in their baking tent! I am still yearning after a red one, but haven't yet plucked up the courage to invest that amount of money in a mixer. Do you use one? If you do I'd love to know what you think & if it's worth it, thanks! I think I've already picked my favourite contestant to win, but I'm keeping that to myself for now. By way of consolation, I've signed myself up for the Great Brownie Bake Off, it's being organised by The Chocolate Consultancy & will take place in London at Look Mum No Hands on October 9th. They are encouraging homebakers to get involved & share their best brownie recipe. Click here for more info, I'll let you know how my Brownie recipe comes along, given I set fire to the last batch I made, I think I need some practise!

On to this weeks recipe & it's a request from my boyf who celebrates his birthday this week, I don't much like banana in cake, but he does so here goes! They're fairly hearty cupcakes so imagine they would be really good for breakfast. I know not everyone likes frosting so I only decorated about half of them. p.s. do you like the new cake stand?

For the cakes
300g plain flour
100g soft brown sugar
50g butter
1 egg
3 ripe bananas
70g fromage frais
1tsp baking powder
1tsp bicarbonate of soda
1tsp cinnamon
Dash of milk

For the frosting
70g butter
170g icing sugar
Few drops vanilla essence
Dash of milk

1. Melt the butter, stir in the sugar, then beat in the egg. Mash the banana together with the fromage frais & cinnamon, then stir it in to the buttery mixture.

2. Sift in the flour, baking powder & bicarbonate of soda, mix until combined, adding a little dash of milk if it's a bit dry.

3. Line a 12 hole bun tin with paper cases & spoon in the mixture. A batch should make 18 cupcakes. Bake them in the oven at 190c/GM5 for 10-12 minutes until golden brown & well risen, lift out & leave to cool completely

4. To make the frosting, cream together the butter & icing sugar, adding a few drops of vanilla & a little dash of milk to help it along. Top the cupcakes with the frosting, I added a banana chip to the top for decoration.

So Happy Birthday M, hope you enjoy your alternative birthday cakes! Don't forget there's still time to enter my blog giveaway for the chance to win a Senseo coffee machine worth £149.99! See you next week, Rebecca x

16 August 2010

Week 31 - Courgette Cake

I know you've probably read the title of this weeks post & thought I've taken leave of my senses, bear with me on this one & I'll come back to the cake in a bit...

So this week it's my birthday & I got talking to my mum about the birthday cakes she'd created for me when I was a kid & I think this could be a contributing factor to my love of baking! We dug through the Hodgson photo albums & managed to find a few pictures which I thought I'd share with you. Sorry they're a bit grainy, but they are *ahem* years old! My favourite is the chocolate finger house, the recipe came from a promotional Cadbury cookbook, I think I loved it so much it was made for 2 birthdays! The Garfield was made for a birthday BBQ party I had, I think all my friends went home bouncing off the walls, how much food colouring went into that!? The other two were a treasure chest complete with sweetie jewellery & a buttercream covered butterfly. I hope you'll agree she's quite creative! Mum's adamant she's not baking one this year as I'm generating quite enough myself, probably just as well :-)


So to celebrate I thought it would be a good opportunity to offer something back to you readers! I'm launching my first blog giveaway, where you have the chance to win a Senseo coffee machine worth £149.99! Click here, or follow the link at the top of the page for more details. Good luck, you have until 27th August to enter!

Back to this weeks recipe & this definitely was an experiment. I was sent it by a lady I work with, who developed it to deal with the mass of courgettes being grown on her allotment. My honest opinion is that I'm really not sure what I think of it? I don't love it, but I don't hate it either! The courgettes do give it a moist texture (a bit like carrot cake), but like courgettes, it doesn't taste of much, other than a rich, not too sweet sponge cake. I do really like the filling however & would use that again.

For the cake
250g courgettes, grated
2 eggs
125ml sunflower oil
150g caster sugar
225g SR flour
1/2tsp baking powder
1/2tsp bicarbonate of soda

For the filling
200g cream cheese
100g icing sugar
Juice of a lime

1. Beat together the eggs, oil & sugar until fluffy. Then sieve in the flour, baking powder & bicarb & mix well. Finally stir in the grated courgettes. Divide the mixture between 2 sandwich tins & bake in the oven at 200c/GM6 for around 25 minutes, leave to cool completely in the tins before tipping out.

2. To make the filling, mix together the cream cheese & icing sugar, finally stir in the lime juice. Use this mixture to sandwich the 2 cakes together.

So there you have it, courgette cake. Not as green as I was expecting (I was thinking it might come out Hulk coloured!), but for me the jury is out on the final verdict. If anyone tries it, I'd be interested to hear what you think? Have a good week, don't forget to enter the giveaway & feel free to forward the link on. Ta ta, Rebecca x

10 August 2010

Week 30 - Lemon Meringue Cake

Hello! It doesn't seem 5 minutes since my last post, but I'm back on schedule & this weeks recipe is another request but more about that in a bit...

So, after 30 solid weeks of baking it has been proving a little tricky for me to maintain at least some level of will power not just to scoff the lot myself! It was ok whilst I was training for the marathon, but I've decided if I want to keep eating cake, I need to take assertive action. Wait for it, I've only gone & joined a gym! This is a big deal for me who has spent the last 3 years doing everything possible to avoid the gym (I even signed up for a belly dancing course for alternative exercise!) Thankfully this is a different type of gym, it's based around circuits & a workout only lasts 30 minutes...I think even I can manage that. I'll let you know how I get on, but don't worry, there will be no danger of me turning into a health freak gym bunny. Sweet indulgence will continue to week 52!

This weeks recipe was a request from my friend Jo, who is leaving work this week to have a baby. Honestly there's something in the water at our place, we girls are a bit nervous to touch the coffee machine just in case! She told me she's been craving lemon meringue so I thought I'd make this cake from Nigella's Feast cookbook. I've made it once before & it went down a storm, it looks really impressive, but it's actually quite easy (definitely easier to construct than the Black Forest Gateaux I made in week 21) I hope she enjoys it & it satisfies the craving!

125g unsalted butter
4 eggs separated
300g caster sugar
100g plain flour
25g cornflour
1tsp baking powder
1/2tsp bicarbonate of soda
Zest of 1 lemon
4tsps lemon juice
2tsps milk
1/2tsp cream of tartar
150ml whipping cream, whipped!
150g lemon curd

1. Cream together the butter & 100g of the sugar, then beat in the egg yolks. Stir in the flour, cornflour, baking powder, bicarb & lemon zest, finally add the lemon juice & milk. Divide the mixture between 2 sandwich tins, there will just be enough to cover the base of the tin.

2. Beat the egg whites until they form soft peaks, then gradually whisk in the sugar. Divide the mixture between the 2 tins, making sure you completely cover the cake mixture. Make the top of 1 tin smooth, peak the other one with a spoon & sprinkle with sugar. Bake in the oven at 200c/GM6 for around 20 minutes. You need to watch it quite carefully to make sure the meringue doesn't over brown. Lift out & leave to cool completely in the tins.

3. To construct the cake, tip out the cake with the smooth top & place it on a plate meringue side down. Spread the lemon curd over the cake, then smooth over the whipped cream. Place the other cake on top, so the peaked meringue is on top.

I think it's best to keep it in the fridge until you are ready to serve, if it lasts that long!? Now don't tell anyone, but it's my birthday next week. To celebrate I'm hoping to launch the first ever Rebecca Bakes Cakes blog giveaway with a fab prize that will provide you with the perfect accompaniment to cake! Until the, Rebecca x

6 August 2010

Week 29 - Creme Catalan

Ola! Sorry this weeks post is much later than usual, but I've been on a well needed break & have just got back from a fab trip to Barcelona. It's definitely my type of city, it's so focused around a foodie lifestyle that to say I've over indulged would be a bit of an understatement! We were lucky enough that our hotel was next door to Mercat La Bouqueria, a produce market that can be traced as far back as the early 1700's. It was unlike any other market I've ever seen, the care & creativity that went into the displays was incredible. There was the most amazing selection of fresh fruit & vegetables, some of which I'd never seen before! There was also stalls selling cured meats, cheeses & general groceries, alongside good old fashioned butchers & fishmongers. If I lived there I don't think I'd ever set foot inside a supermarket again if I could help it!

Catalans have such a relaxed attitude to food (well to everything really not just food!), I'm pretty sure you could sit & eat tapas all day & no one would bat an eyelid. My particular favourites were Manchago cheese, Iberian ham & tomato bread, as the name would suggest it's toasted bread, spread with fresh tomato paste & drizzled with olive oil...mmm, making myself hungry again. Here are a few of my favourite foodie photos of our trip.


So as you've probably guessed, this weeks recipe is inspired by the trip to Barcelona & is a traditional Catalan dessert. It's really simple to make & involves no baking (sorry feel a bit of a cheat this week!) It would be a great dinner party dessert as you can make it well in advance & just flash it under the grill when ready to serve.

60g sugar
2 egg yolks
1/2 tbsp cornflour
250ml double cream
Zest of 1 lemon
Cinnamon stick

1. Beat together the egg yolks & sugar in a small pan, gradually add the cream, then the lemon zest & cornflour. Whisk in the cornflour, quite vigorously to avoid lumps! Finally add the cinnamon stick.

2. Heat gently, stirring all the time until you start to feel the mixture thicken. As soon as you see even 1 bubble, remove it from the heat, scoop out the cinnamon stick & give it another good whisk before dividing it between 2 ramekins.

3. Pop into the fridge to chill for a couple of hours, then when ready to serve sprinkle a little brown sugar on the top & put under a hot grill until the sugar bubbles.

The lemon & cinnamon are really subtle flavours, but somehow, despite the richness of the cream, give it a fresh light taste. I never seem to have much luck browning things under my grill, so if you have a cooks blow torch, I'd recommend using that instead. I've added one onto my objects of desire list!

Hope you enjoy, I'm off to see if I can rustle up a Sangria from the contents of my fridge/wine rack. See you next week for another recipe request. Have a great weekend amigos! Rebecca x

28 July 2010

Week 28 - Whoopie Pies

So Whoopie Pies are apparently the new cupcake & in my quest to stay at the cutting edge of baking trends *ahem* I've had a crack at making them this week! By the wonders of the internet I have discovered the following things about Whoopie Pies...

1. They originated in the Pennsylvanian Amish community

2. Amish wives would bake them & put them in their husbands lunchboxes, when they discovered the treats they would shout WHOOPIE (I can't imagine a Brit husband getting quite so excited about finding a custard cream!?)

3. The tradition of using Marshmallow Fluff for the filling came from the manufacturers of Fluff featuring it in a Whoopie Pie recipe included in a 1930's cookbook called Yummy Book (I'd love to get hold of a copy of that!)

When I was researching what should go into a Whoopie Pie, I got a bit baffled by all the different options. This recipe was kindly sent to me by Roddas Cornish Clotted Cream & they have given them a distinctly Cornish twist, suggesting you fill them with their cream. I think that sounds like a great suggestion, but for my first attempt I'm staying true to the original & have chosen to make the traditional fluff filling. This part of the recipe is taken from the Marshmallow Fluff website. I chose to use Strawberry Fluff as I thought it would complement the chocolate & the fact it's the most amazing shade of pink!

For the cakes
100g unsalted butter
185g muscovado sugar
1 egg
300g plain flour
1tsp baking powder
1tsp bicarbonate of soda
1tsp vanilla extract
100-150ml milk

For the filling
1/2 jar of marshmallow fluff
130g icing sugar
100g butter
Dash of milk

1. Cream together the butter & sugar, then beat in the egg & vanilla.

2. Sift together all the dry ingredients, then add about half to the butter mixture along with about half the milk, mix well. Add the remaining half of the flour etc & enough milk to make a smooth mixture of dropping consistency.

3. Grease a baking sheet & place on small dollops of the mixture, leaving plenty of space in between for them to expand. I made 24 individual cakes from 1 batch. Bake in the oven at 180c/GM5 for 12-15 minutes until well risen & springy to the touch. Place onto a wire rack to cool completely.

4. To make the filling, cream together the butter & icing sugar, adding a little dash of milk to help it along, then beat in the Marshmallow Fluff until all combined. Match up the cakes into pairs, then use the fluffy filling to sandwich them together. I also added a drizzle of melted dark chocolate to the top!

These are quite possibly the most amazing thing ever! Delicious! They are pretty large, so unless you're feeling hungry I'd suggest sharing one with a friend over a glass of ice cold milk! Hope you enjoy making your own Whoopie *sniggers* I'll hopefully see you next week, I've booked a last minute trip away, so I'm hoping the technology will mean I can keep my unbroken record for a 29th week...until then, Rebecca x

13 October 2010

Week 39 - Christmas Cake

Hello, how are we all? So bad news out of the way first, I didn't win the Brownie Bake Off :-( Lets get straight on to happier news from cake towers!!

You may remember a couple of months back I told you I'd joined a gym to try & counteract all the cake I was scoffing as a result of this challenge. Well it was a 6 week trial & in true me style I got bored & have decided not to join up full time, so that leaves a big exercise shaped hole in my week. You might not know this, but as well as being an amateur baker & fluffy marketer, I'm also a tap dancer & go to a class once a week! Inspired by Strictly starting again I decided I'd have a go at a new dance class. I say dance, it's aerobics really, but takes it's moves from a number of different dance styles & it's the new 'thing' to do apparently. It's ZUMBA & quite honestly it's bonkers! You really have to leave your self consciousness at the door & are encouraged to shake what your Mama gave you as much as possible (sadly mine shakes in different directions at the same time!) It's a brilliant work out & a lot of fun, I've never laughed so much through a class before, I'll definitely be going back. I hope I won't get bored of it, I'm starting to run short of exercise options!

Now you may look at the title of this weeks post & think, give over, it's only October I can't possibly think about Christmas yet? But it's exactly the right time to make the cake, especially if you're like me & want it to marinade in brandy for the next 10 weeks. This is a bit of a tradition in the Hodgson household & usually comes with a ABV rating!  The recipe is taken from an old Good Housekeeping cook book that has been in the family for years.
225g currants
225g sultanas
225g raisins
100g mixed peel
100g glace cherries chopped
50g flaked almonds
225g plain flour
1tsp mixed spice
225g butter
225g soft brown sugar
Grated rind of a lemon
4 eggs, beaten
2tbsps brandy

1. Cream the butter, sugar & lemon rind until light & fluffy, then add the eggs a little at a time, beating as you go. Fold in flour, spice & brandy, finally mix in the fruit & nuts.

2. Cut out a piece of baking paper to line the bottom of the tin, then cut another piece that will fit around the inside of the tin. Pour the mixture into the prepared tin & bake in the oven at 150c/GM3 for 3 3/4 - 4 hours. To stop the top over browning I cover it with a piece of baking paper after about an hour and a half.

3. When cooked, lift it out & leave to cool completely in the tin. I leave mine in the baking paper & store it in an airtight tin. About a week later, poke holes in the top of the cake using a skewer, then drizzle a tablespoon of brandy over the top. Repeat once a week (or as often as you like!) until Christmas.

I usually decorate my cake the week before Christmas, so I'll keep you posted about my decoration of choice this year. Enjoy your week, I'll be back with a treat I'm creating for my best friends birthday...it's set to be a challenge for me! Till then, Rebecca x

6 October 2010

Week 38 - Lemon Drizzle Cake

Evening! It's been a busy week this week with lots to tell you, but first I'd like to say thanks to those of you who shared your Victoria Sponge secrets. It really was the most pathetic excuse for a cake, but I think I've picked up a good few tips & will be testing them out in the coming weeks. I'll let you know how I get on...

So as well as the weekly recipe, I've also been practising for the Great Brownie Bake Off this Saturday. I've just about perfected the recipe so bring on the competition! You can find more details about the event here If you're in the area come along, it looks like a great line up of demonstrations from various bakers as well as appearance by Edd, winner of the Great British Bake Off. Fingers crossed, results next week.

Thanks to everyone who voted in my poll last week, it was a bit of a contest between Peanut Butter Cookies & Lemon Drizzle Cake, poor old Carrot Cake didn't seem to get a look in! Lemon Drizzle won, so here's my take on the tea time classic. This week I was kindly sent a selection of products from Total Greek Yoghurt to experiment with in my baking. I have used yoghurt before in muffins & it really does give a delicious soft texture. So I thought I'd try adding it to a Lemon Drizzle Cake, it's the perfect addition to ensure a squidgy, gooey cake...for me, exactly what Lemon Drizzle should be!

300g plain flour
200g caster sugar
170g butter melted
250ml Total Greek Yoghurt
2 eggs
1 heaped tsp baking powder
1 tsp bicarbonate of soda
2 lemons zested & juiced
100g granulated sugar

1. Beat together the sugar & eggs, add the melted butter, yoghurt & lemon zest. Finally stir in the flour, baking powder & bicarb.

2. Pour into a baking tin & bake at 180c/GM5 for around 45-55 minutes until well risen & golden on the top. Leave to cool for 10 minutes in the tin, then lift out onto a rack.

3. To make the drizzle, mix together the lemon juice & granulated sugar. Once cooled, using a skewer poke small holes into the top of the cake, then pour over the drizzle. This doesn't have to be exact as it will all seep through the cake. Leave it to set & you should have a gorgeous sugar crust on the top!

So there you have it, delicious Lemon Drizzle Cake & as its got yoghurt in it, we can kid ourselves it's healthy. I'll be trying out a few other things with the yoghurt including a dessert my Kiwi colleague recommended called Ambrosia (no not custard), which looks like a variation on an Eton Mess! Enjoy, till next week, Rebecca x

29 September 2010

Week 37 - Victoria Sponge (attempt 1!)

Hello! I'm so excited, after weeks of procrastinating & deliberating over colours I am now the proud owner of a shiny new Kitchen Aid mixer! It's an absolute lump of a thing, but it's soooo pretty. I think it's going to take a bit of trial & error to get the best out of it, it's a bit different from my battered old food processor. I love having such an icon in my kitchen, makes me feel like a proper grown up! The next big decision was what to make this week to christen it? I settled on a classic Victoria Sponge cake which to be honest I've never had much success with in the past. I thought I'd see if the Kitchen Aid helped me any, short answer...it didn't!

I'm not really quite sure where I'm going wrong? The mixture did seem a little lumpy, but it rose quite well (but dropped back just as quickly!) The texture is moist, but it was a little on the heavy side. If anyone has any tips on making the perfect Victoria Sponge I'd love to hear them. I will be practising, I want to get to the ultimate cake by week 52! Don't worry it won't just be the same recipe for the next 15 weeks, that would get a bit boring eh? But I'll keep you updated on my progress.

For the cake
100g butter
100g caster sugar
2 eggs
100g self raising flour

For the filling
75g butter
175g icing sugar
3tbsp strawberry jam

1. Cream the butter & sugar until light & fluffy, then beat in the eggs one at a time. Finally fold in the flour.

2. Grease a cake pan & pour in the mixture, spreading it evenly. Bake in the oven at 190c/GM5 for around 20 minutes. Leave to cool on a rack.

3. Cream together the butter & icing sugar to make the butter cream filling. Using a bread knife, cut the cake through the middle, then sandwich the two halves together with the butter cream & jam.

I think I could have split the mixture between 2 tins, maybe I'll try that next time? Granted it's not the most attractive looking cake (not as pretty as the Kitchen Aid!!), but I have to say it tasted good. Just need to improve on the light & fluffiness!

You may have noticed a new feature on the blog, a poll for you dear readers! I'd like you to choose next weeks recipe for me, I've chosen 3 recipes that I haven't yet got round to baking, just vote for your favourite & that's what I'll make next week, simples! Enjoy, Rebecca x

My new baby!

22 September 2010

Week 36 - Fruit Bread

Phew, I'm back from my European tour of the Douwe Egberts offices! It's been an interesting month, I've learnt far more than I ever thought I would about coffee, however I'm really looking forward to having some more time to concentrate on my baking. Apologies, I feel like I've neglected you over the last few weeks & I don't think things have been up to my usual standard. That's probably because I've taken to baking at all hours & I've realised 1am is not my finest hour for creating recipes!

Did you watch the final of the Great British Bake off last night? I don't know how they came to a decision between the final 3, they were so close! I would have been happy whoever won, I kept changing my mind every time they presented another delicious baked goodie. I think my favourite from the final was Ruth's Mint, Ginger & Blackberry cakes, they looked so gorgeous. Just reinforced the fact that I need to go on a cake decorating course to make mine look a little prettier! There's talk of another series for next year...hmm, maybe?? In the meantime I've signed up for the Great Brownie Bake Off that's being hosted by The Chocolate Consultancy on October 9th, so I'll be spending the next 3 weeks perfecting my brownies!

This week, having more time, I decided to have a go at making bread. I've always cheated & used my bread maker, but thats now been banished to the back of the cupboard to make space in my kitchen for my new coffee machine. It was pretty simple to make actually, you just need patience, checking the airing cupboard every 10 minutes to see how it's doing is probably not ideal! I decided to go for a rich fruit bread that I could either eat for breakfast or afternoon tea.

250g strong white bread flour
35g butter melted
35g caster sugar
1/2 tsp salt
7g sachet dried yeast
1 egg beaten
1 tsp ground cinnamon
35g sultanas
30g mixed peel
75ml milk mixed with 75ml water
Zest of 1 orange & 1 lemon (plus a little squeeze of lemon juice

1. Put the flour, sugar, salt, yeast, butter & egg into a large bowl. Add the liquid a little at a time, once it's all combined, stir for at least 3 minutes. Tip out the dough onto a surface dusted with flour & knead for a further 5 minutes. Add a little more flour if needed to get a smooth elastic dough. Pop it back in the bowl & leave to rise for 1.5 hours.


2. Mix the fruit, spice & zest together in a bowl. Tip out the dough back onto the board & combine the fruit mixture into the dough. Shape it into a sausage & place it on a baking tray lined with parchment. Leave to rise for another hour.


3. Bake in the oven at 220c/GM7 for 20 minutes until golden brown. Lift out & leave to cool on a rack.

I'm so chuffed with my first from scratch loaf of bread. It's delicious sliced, toasted & smothered in butter, I can highly recommend it! Have a good week everyone, see you next week, Rebecca x

p.s. has anyone else made their Christmas cake yet? I'm starting to stress it's nearly October & I haven't made mine yet...I'm losing valuable alcohol soaking time!!

15 September 2010

Week 35 - Mars Bar Cupcakes

Evening! I'm back from Belgium just long enough to rustle up this weeks recipe. I also bring good news! You may remember a while back I created a recipe for Malteser Cookies for a competition that was being run by MyDish. Well sadly I didn't win, so no shiny new Kitchen Aid mixer for me, but I was a runner up! That means I have a parcel of chocolate goodies heading my way...as if I didn't have enough calories to deal with every week :-) Here's the link to the original post, it's a dead simple recipe to make, so why not have a go yourself?


You may have noticed that this week is National Cupcake Week (it's also Scottish Food Fortnight & Organic Food Fortnight!), so it only seemed right to make some sort of cupcake. Sweeties have often been a source of inspiration for recipes so this week I'm paying homage to the good old Mars Bar. I found them great to bake with, the nougat bit stays soft, but the caramel turns into lovely chewy toffee. Yum!


For the cakes
60g butter
100g caster sugar
1 egg
Few drops of vanilla essence
300g plain flour
1tsp baking powder
1tsp bicarbonate of soda
100-150ml milk
2 Mars Bar Duo's chopped into small chunks

For the topping
80g plain chocolate
2tbsp icing sugar
Dash of milk
1 bag Mars Planets

1. Melt the butter, stir in the sugar, then beat in the egg. Fold in the flour, then add the milk a little at a time until you get a dropping consistency. Finally stir in the chopped up Mars Bars.

2. Line a 12 hole bun tin with paper cases & spoon in the mixture. I made 18 cakes, so had to bake 2 batches. Bake in the oven at 180c/GM5 for around 10-12 minutes. Lift out, leave to cool for a minute, then transfer to a rack.

3. To make the topping melt the chocolate, then stir in the icing sugar adding a little milk to make it smooth. Drizzle over the top of each cake, then top it off with a Mars Planet sweet.

Hope you enjoy what's left of National Cupcake Week, it's a good excuse to eat cake I guess! I'm off to Holland again next week & will be on a mission to get a traditional recipe for Dutch Apple Cake from one of my colleagues. Till next week, Happy Baking, Rebecca x

7 September 2010

Week 34 - Rhubarb & Orange Crumble Cake

Hello! Sorry this is going to be a bit of a short post this week. I'm on a bit of a European tour with work this month & as much as I could ramble on about coffee & my numerous trips to Belgium & Holland, I'm going to just keep it all about the cake!

So last week I mentioned that my good friend had been inspired to bake up a feast over the bank holiday weekend. One of the cakes she made was so delicious, I promised I would make it this week. The recipe came from an old Good Housekeeping recipe book & is made with rhubarb from her own garden (which I think makes it taste even better!) Anne gave me a good tip for preparing the rhubarb so it keeps its shape & doesn't go too mushy. Wash it & cut it into chunks, place it on a baking tray, add a little water, then pop it in the oven on 180c/GM4 for around 15 minutes. Lift it out & leave it cool, then drain off the excess water. Then it's ready to use.

For the cake
125g butter
125g caster sugar
125g self raising flour
2 eggs
Finely grated rind of 1 orange
200g rhubarb (prepared as above)

For the crumble
60g butter
125g plain flour
2 tbsp sugar
1/2 tsp cinnamon

1. Cream together the butter & sugar, gradually beat in the eggs until light & fluffy. Fold in the flour & orange rind. Pour the mixture into a loose bottom cake tin, then spread the prepared rhubarb over the top.

2. To make the crumble rub together the butter & flour until you have something that looks like fine breadcrumbs, then stir in the sugar & cinnamon. Spread the crumble over the top of the rhubarb.

3. Bake in the oven at 190c/GM5 for around 45-50 minutes until the crumble has just started to brown. Lift out & leave to cool before lifting out of the tin.

I served this as a dessert, warm, with a good dollop of cream. It would probably work just as well with custard, or cold with a cup of tea! It's hard to believe I've only got 18 weeks left to go in my baking challenge, the weeks are whizzing by! I hope you're still enjoying all the cakes? Thanks for all your comments, I love hearing from you! Have a good week, I'm off to unpack, then pack again. Take care, Rebecca x

1 September 2010

Week 33 - Oaty Cookies

Hello cookie monsters, here we are for another week of cakiness from the house of Rebecca Bakes Cakes. I hope you all enjoyed the bank holiday weekend, slightly upsetting to think that's it for holidays until Christmas :-( I had a cake filled weekend (even more so than usual!) I went to Cake Britain at The Futures gallery in London, it was organised by the Mad Artist Tea Party & featured an amazing collection of sculptures made entirely out of cake! I've put a few piccies of my favourites at the bottom of the post. It's also made me realise that it's time I prettied my cakes up a bit, so I've been inspired to sign up to a cake decorating class. Need to start researching, but if anyone can recommend one in the Berkshire area, let me know.

The second part of my cake weekend involved an afternoon invite over to my best friends house, with the instruction 'make sure you have an appetite!' I arrived to find Anne had been baking like a mad women, making millionaires shortbread, spiced apple cake & a.n. other cake, that I'm keeping under wraps as I'm going to make it next week! They were all delicious & I must admit it was really nice to be the one being baked for for a change. So just goes to prove, there's a domestic goddess in all of us, just need to find a way to let her out. Good work Anne, you've set your standards high! x

So this weeks recipe is one of my favourites & I've always called them Oaty Cookies, but I took some round to my mum & she described them as rock cakey thingies! I suppose they are a bit like rock cakes, a bit like a flapjack & crispy on the edges so a bit like a cookie. Essentially they don't know what they are really, I think I've created my first cake with an identity crisis! Well whatever they are, they taste delicious...

125g butter
200g caster sugar or demerera sugar for extra crunch!
1 egg
1 tsp vanilla
100g plain flour
1/4 tsp baking powder
1/4 tsp bicarbonate of soda
175g oats
80g sultanas or raisins

1. Cream together the butter & sugar, then beat in the egg & vanilla. Stir in the flour, bicarb & baking powder. Finally stir in the oats & fruit.

2. Place small dollops of mixture onto a baking tray, leaving space for them to spread. Bake in the oven at 180c/GM5 for around 8 - 10 minutes until golden brown. Leave on the tray to set for a few minutes then transfer to a rack to cool.

Hope you enjoy them! Final thing from me this week is to announce the winner of my blog giveaway, the random number generator selected

The Mad House

as my lucky winner, so congratulations, I hope you enjoy the coffee! Thanks to everyone who entered, I loved reading about your favourite cakes, given me a bit of inspiration for weeks to come. Hopefully I'll be able to run another giveaway soon, need to sweet talk another colleague into donating a prize! Enjoy your week, I'm off to Holland for a few days so bring on the waffles...or is that Belgium? Oh I don't know....ta ta, Rebecca x

24 August 2010

Week 32 - Banana Cinnamon Cupcakes

Hey there! So last weeks recipe...it created quite a bit of debate & I'll be honest it's probably the first week in my baking marathon that I've found it difficult to share the cake! Lets put it down to experience & not mention it again :-)

Have you been bitten by the Great British Bake Off bug yet? I've been watching it, going green with envy, not just about all the fab challenges they get to tackle, but also the rainbow selection of Kitchen Aid mixers in their baking tent! I am still yearning after a red one, but haven't yet plucked up the courage to invest that amount of money in a mixer. Do you use one? If you do I'd love to know what you think & if it's worth it, thanks! I think I've already picked my favourite contestant to win, but I'm keeping that to myself for now. By way of consolation, I've signed myself up for the Great Brownie Bake Off, it's being organised by The Chocolate Consultancy & will take place in London at Look Mum No Hands on October 9th. They are encouraging homebakers to get involved & share their best brownie recipe. Click here for more info, I'll let you know how my Brownie recipe comes along, given I set fire to the last batch I made, I think I need some practise!

On to this weeks recipe & it's a request from my boyf who celebrates his birthday this week, I don't much like banana in cake, but he does so here goes! They're fairly hearty cupcakes so imagine they would be really good for breakfast. I know not everyone likes frosting so I only decorated about half of them. p.s. do you like the new cake stand?

For the cakes
300g plain flour
100g soft brown sugar
50g butter
1 egg
3 ripe bananas
70g fromage frais
1tsp baking powder
1tsp bicarbonate of soda
1tsp cinnamon
Dash of milk

For the frosting
70g butter
170g icing sugar
Few drops vanilla essence
Dash of milk

1. Melt the butter, stir in the sugar, then beat in the egg. Mash the banana together with the fromage frais & cinnamon, then stir it in to the buttery mixture.

2. Sift in the flour, baking powder & bicarbonate of soda, mix until combined, adding a little dash of milk if it's a bit dry.

3. Line a 12 hole bun tin with paper cases & spoon in the mixture. A batch should make 18 cupcakes. Bake them in the oven at 190c/GM5 for 10-12 minutes until golden brown & well risen, lift out & leave to cool completely

4. To make the frosting, cream together the butter & icing sugar, adding a few drops of vanilla & a little dash of milk to help it along. Top the cupcakes with the frosting, I added a banana chip to the top for decoration.

So Happy Birthday M, hope you enjoy your alternative birthday cakes! Don't forget there's still time to enter my blog giveaway for the chance to win a Senseo coffee machine worth £149.99! See you next week, Rebecca x

16 August 2010

Week 31 - Courgette Cake

I know you've probably read the title of this weeks post & thought I've taken leave of my senses, bear with me on this one & I'll come back to the cake in a bit...

So this week it's my birthday & I got talking to my mum about the birthday cakes she'd created for me when I was a kid & I think this could be a contributing factor to my love of baking! We dug through the Hodgson photo albums & managed to find a few pictures which I thought I'd share with you. Sorry they're a bit grainy, but they are *ahem* years old! My favourite is the chocolate finger house, the recipe came from a promotional Cadbury cookbook, I think I loved it so much it was made for 2 birthdays! The Garfield was made for a birthday BBQ party I had, I think all my friends went home bouncing off the walls, how much food colouring went into that!? The other two were a treasure chest complete with sweetie jewellery & a buttercream covered butterfly. I hope you'll agree she's quite creative! Mum's adamant she's not baking one this year as I'm generating quite enough myself, probably just as well :-)


So to celebrate I thought it would be a good opportunity to offer something back to you readers! I'm launching my first blog giveaway, where you have the chance to win a Senseo coffee machine worth £149.99! Click here, or follow the link at the top of the page for more details. Good luck, you have until 27th August to enter!

Back to this weeks recipe & this definitely was an experiment. I was sent it by a lady I work with, who developed it to deal with the mass of courgettes being grown on her allotment. My honest opinion is that I'm really not sure what I think of it? I don't love it, but I don't hate it either! The courgettes do give it a moist texture (a bit like carrot cake), but like courgettes, it doesn't taste of much, other than a rich, not too sweet sponge cake. I do really like the filling however & would use that again.

For the cake
250g courgettes, grated
2 eggs
125ml sunflower oil
150g caster sugar
225g SR flour
1/2tsp baking powder
1/2tsp bicarbonate of soda

For the filling
200g cream cheese
100g icing sugar
Juice of a lime

1. Beat together the eggs, oil & sugar until fluffy. Then sieve in the flour, baking powder & bicarb & mix well. Finally stir in the grated courgettes. Divide the mixture between 2 sandwich tins & bake in the oven at 200c/GM6 for around 25 minutes, leave to cool completely in the tins before tipping out.

2. To make the filling, mix together the cream cheese & icing sugar, finally stir in the lime juice. Use this mixture to sandwich the 2 cakes together.

So there you have it, courgette cake. Not as green as I was expecting (I was thinking it might come out Hulk coloured!), but for me the jury is out on the final verdict. If anyone tries it, I'd be interested to hear what you think? Have a good week, don't forget to enter the giveaway & feel free to forward the link on. Ta ta, Rebecca x

10 August 2010

Week 30 - Lemon Meringue Cake

Hello! It doesn't seem 5 minutes since my last post, but I'm back on schedule & this weeks recipe is another request but more about that in a bit...

So, after 30 solid weeks of baking it has been proving a little tricky for me to maintain at least some level of will power not just to scoff the lot myself! It was ok whilst I was training for the marathon, but I've decided if I want to keep eating cake, I need to take assertive action. Wait for it, I've only gone & joined a gym! This is a big deal for me who has spent the last 3 years doing everything possible to avoid the gym (I even signed up for a belly dancing course for alternative exercise!) Thankfully this is a different type of gym, it's based around circuits & a workout only lasts 30 minutes...I think even I can manage that. I'll let you know how I get on, but don't worry, there will be no danger of me turning into a health freak gym bunny. Sweet indulgence will continue to week 52!

This weeks recipe was a request from my friend Jo, who is leaving work this week to have a baby. Honestly there's something in the water at our place, we girls are a bit nervous to touch the coffee machine just in case! She told me she's been craving lemon meringue so I thought I'd make this cake from Nigella's Feast cookbook. I've made it once before & it went down a storm, it looks really impressive, but it's actually quite easy (definitely easier to construct than the Black Forest Gateaux I made in week 21) I hope she enjoys it & it satisfies the craving!

125g unsalted butter
4 eggs separated
300g caster sugar
100g plain flour
25g cornflour
1tsp baking powder
1/2tsp bicarbonate of soda
Zest of 1 lemon
4tsps lemon juice
2tsps milk
1/2tsp cream of tartar
150ml whipping cream, whipped!
150g lemon curd

1. Cream together the butter & 100g of the sugar, then beat in the egg yolks. Stir in the flour, cornflour, baking powder, bicarb & lemon zest, finally add the lemon juice & milk. Divide the mixture between 2 sandwich tins, there will just be enough to cover the base of the tin.

2. Beat the egg whites until they form soft peaks, then gradually whisk in the sugar. Divide the mixture between the 2 tins, making sure you completely cover the cake mixture. Make the top of 1 tin smooth, peak the other one with a spoon & sprinkle with sugar. Bake in the oven at 200c/GM6 for around 20 minutes. You need to watch it quite carefully to make sure the meringue doesn't over brown. Lift out & leave to cool completely in the tins.

3. To construct the cake, tip out the cake with the smooth top & place it on a plate meringue side down. Spread the lemon curd over the cake, then smooth over the whipped cream. Place the other cake on top, so the peaked meringue is on top.

I think it's best to keep it in the fridge until you are ready to serve, if it lasts that long!? Now don't tell anyone, but it's my birthday next week. To celebrate I'm hoping to launch the first ever Rebecca Bakes Cakes blog giveaway with a fab prize that will provide you with the perfect accompaniment to cake! Until the, Rebecca x

6 August 2010

Week 29 - Creme Catalan

Ola! Sorry this weeks post is much later than usual, but I've been on a well needed break & have just got back from a fab trip to Barcelona. It's definitely my type of city, it's so focused around a foodie lifestyle that to say I've over indulged would be a bit of an understatement! We were lucky enough that our hotel was next door to Mercat La Bouqueria, a produce market that can be traced as far back as the early 1700's. It was unlike any other market I've ever seen, the care & creativity that went into the displays was incredible. There was the most amazing selection of fresh fruit & vegetables, some of which I'd never seen before! There was also stalls selling cured meats, cheeses & general groceries, alongside good old fashioned butchers & fishmongers. If I lived there I don't think I'd ever set foot inside a supermarket again if I could help it!

Catalans have such a relaxed attitude to food (well to everything really not just food!), I'm pretty sure you could sit & eat tapas all day & no one would bat an eyelid. My particular favourites were Manchago cheese, Iberian ham & tomato bread, as the name would suggest it's toasted bread, spread with fresh tomato paste & drizzled with olive oil...mmm, making myself hungry again. Here are a few of my favourite foodie photos of our trip.


So as you've probably guessed, this weeks recipe is inspired by the trip to Barcelona & is a traditional Catalan dessert. It's really simple to make & involves no baking (sorry feel a bit of a cheat this week!) It would be a great dinner party dessert as you can make it well in advance & just flash it under the grill when ready to serve.

60g sugar
2 egg yolks
1/2 tbsp cornflour
250ml double cream
Zest of 1 lemon
Cinnamon stick

1. Beat together the egg yolks & sugar in a small pan, gradually add the cream, then the lemon zest & cornflour. Whisk in the cornflour, quite vigorously to avoid lumps! Finally add the cinnamon stick.

2. Heat gently, stirring all the time until you start to feel the mixture thicken. As soon as you see even 1 bubble, remove it from the heat, scoop out the cinnamon stick & give it another good whisk before dividing it between 2 ramekins.

3. Pop into the fridge to chill for a couple of hours, then when ready to serve sprinkle a little brown sugar on the top & put under a hot grill until the sugar bubbles.

The lemon & cinnamon are really subtle flavours, but somehow, despite the richness of the cream, give it a fresh light taste. I never seem to have much luck browning things under my grill, so if you have a cooks blow torch, I'd recommend using that instead. I've added one onto my objects of desire list!

Hope you enjoy, I'm off to see if I can rustle up a Sangria from the contents of my fridge/wine rack. See you next week for another recipe request. Have a great weekend amigos! Rebecca x

28 July 2010

Week 28 - Whoopie Pies

So Whoopie Pies are apparently the new cupcake & in my quest to stay at the cutting edge of baking trends *ahem* I've had a crack at making them this week! By the wonders of the internet I have discovered the following things about Whoopie Pies...

1. They originated in the Pennsylvanian Amish community

2. Amish wives would bake them & put them in their husbands lunchboxes, when they discovered the treats they would shout WHOOPIE (I can't imagine a Brit husband getting quite so excited about finding a custard cream!?)

3. The tradition of using Marshmallow Fluff for the filling came from the manufacturers of Fluff featuring it in a Whoopie Pie recipe included in a 1930's cookbook called Yummy Book (I'd love to get hold of a copy of that!)

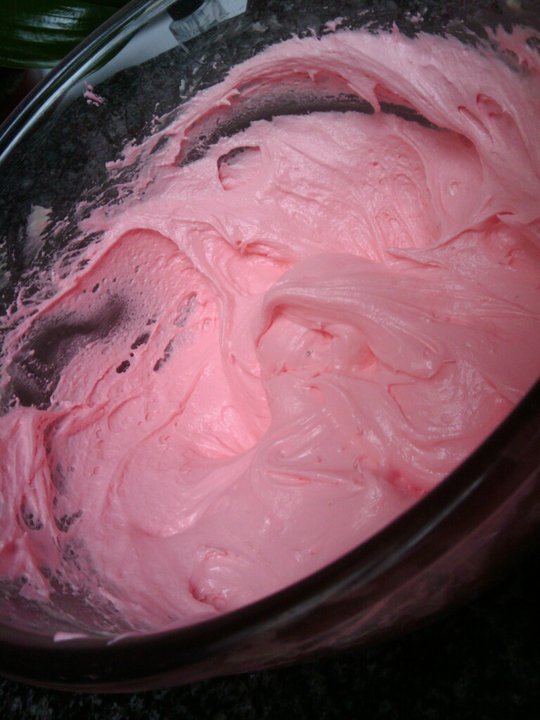
When I was researching what should go into a Whoopie Pie, I got a bit baffled by all the different options. This recipe was kindly sent to me by Roddas Cornish Clotted Cream & they have given them a distinctly Cornish twist, suggesting you fill them with their cream. I think that sounds like a great suggestion, but for my first attempt I'm staying true to the original & have chosen to make the traditional fluff filling. This part of the recipe is taken from the Marshmallow Fluff website. I chose to use Strawberry Fluff as I thought it would complement the chocolate & the fact it's the most amazing shade of pink!

For the cakes
100g unsalted butter
185g muscovado sugar
1 egg
300g plain flour
1tsp baking powder
1tsp bicarbonate of soda
1tsp vanilla extract
100-150ml milk

For the filling
1/2 jar of marshmallow fluff
130g icing sugar
100g butter
Dash of milk

1. Cream together the butter & sugar, then beat in the egg & vanilla.

2. Sift together all the dry ingredients, then add about half to the butter mixture along with about half the milk, mix well. Add the remaining half of the flour etc & enough milk to make a smooth mixture of dropping consistency.

3. Grease a baking sheet & place on small dollops of the mixture, leaving plenty of space in between for them to expand. I made 24 individual cakes from 1 batch. Bake in the oven at 180c/GM5 for 12-15 minutes until well risen & springy to the touch. Place onto a wire rack to cool completely.

4. To make the filling, cream together the butter & icing sugar, adding a little dash of milk to help it along, then beat in the Marshmallow Fluff until all combined. Match up the cakes into pairs, then use the fluffy filling to sandwich them together. I also added a drizzle of melted dark chocolate to the top!

These are quite possibly the most amazing thing ever! Delicious! They are pretty large, so unless you're feeling hungry I'd suggest sharing one with a friend over a glass of ice cold milk! Hope you enjoy making your own Whoopie *sniggers* I'll hopefully see you next week, I've booked a last minute trip away, so I'm hoping the technology will mean I can keep my unbroken record for a 29th week...until then, Rebecca x