Showing posts with label chocolate. Show all posts

22 May 2012

Very very chocolately cookies from Cox Cookies & Cake

Over the last few years as my baking habit has grown, so it seems has my collection of cook books, most of which I have very gratefully recieved as gifts. I love looking through them for inspiration & to drool over the pictures, but if I think about it, it's not that often I actually choose a new recipe from a book & try it out. I have my staple recipes that I pretty much know off by heart, then the rest is a series of experiments, some more successful than others!

So I've decided to branch out, broaden my repertoire & try out at least one new recipe from each of my books. The first is from Cox Cookies & Cake, a collaboration beween baker Eric Lanlard & the designer Patrick Cox.  The book is a technicolour spectacular divided into themed chapters, my particular favourite is the Styling Cupcakes section.  Although where one is meant to find a beach bum mould & skin-coloured edible paste I have no idea, (Cheeky Cupcakes on page 100 if you get a chance to look at the book!)

Easing myself gently into this somewhat eccentric cook book, I decided to make double chocolate & marshmallow cookies, the Man Cakes (page 108) will have to wait for another day.


They really should be called Choc as much choc as you can into a cookie cookie.  They have melted chocolate, cocoa powder & chocolate chips in them, topped off with a good drizzle of melted marshmallow.  The texture was quite cakey rather than crunchy cookie, but oh my god they tasted good!  Next on the hit list for this book is the Orange Marmalade Cupcakes, it's worth a look if you want some more unusual ideas & if anyone knows where I can find a torso mould let me know :-)  Till next time, Rebecca x 


9 February 2012

Hunk a chunk of choccy love!

I'm not one to get swept away in the commercialism of Valentines Day (that might sound strange coming from a marketeer!) I find it a bit overwhelming the variety of items that are Valentinised all in a bid to 'get us in the mood'. How slapping a few hearts & flowers onto a standard supermarket product is meant to do that I just don't know? That's not to say that I ignore the day, but I'd rather make something myself that feels more personal & special. As is the case for most occasions, I usually bake!

Last year I took part in a Forever Nigella challenge & tried out her recipe for Love Buns (still makes me giggle!) Click here to take a look back at that post.

So keeping with the competition theme, this year I was invited by Baking Mad to go head to head with 14 other bloggers. The challenge was to create my ultimate Valentines treat, using a minimum of 3 ingredients from a mystery box of goodies I was sent.

Where to start? What to bake? Cake? Biscuit? Brownie? Cupcake? Arrghh...too many options! Then inspiration struck me! Now bear with me on this explanation, I'm not even quite sure how exactly my brain worked it's way round to this...

I was listening to my ipod on shuffle, the Elvis track Burning Love came on. If you're not familiar with it, at the end of the song there is a section that goes, 'hunk a hunk of burning love'. My head was singing 'hunk a chunk of burning love', which made me think of chocolate, which lead me onto Rocky Road...et voila, this weeks recipe! In honour of it's inspiration I have named it,

Hunk a Chunk of Choccy Love

The ingredients I selected from my ready steady cook style package were:

A large bar of chocolate
Chocolate heart sprinkles
Giant white chocolate snowies
Pink shimmer balls
Dark chocolate melt & squeeze topping
White chocolate letters

To these I also added:

150g unsalted butter
200g shortbread biscuits (bashed up a bit into chunks)
50g sultanas
50g glace cherries
1tbsp golden syrup

1. Melt the butter, chocolate & syrup together. Stir in the bashed up biccies & fruit & stir well until all combined.

2. Line a dish with baking parchment, pour in the mixture & press down firmly. Leave in the fridge to set for 20 mins.

3. Melt the topping & spread evenly over your base, decorate at will! Pop back into the fridge to set fully.

I didn't leave mine to set for long enough before adding the topping, so some of the butter from the mixture rose up through the topping, making a bit of a mottled effect on the top. Hasn't effected the taste at all, but you might be able to see from the picture it meant the top looked a little uneven.


When it was set solid, I took the slab out of the dish & paper, wrapped it in fresh baking parchment & tied it up with a ribbon!


What I really like about this (other than it's delicious chocolatey biscuity loveliness) is you can cut a chunk as big or as small as you fancy & it lasts for ages in the fridge. It's not like cake that I feel compelled to eat as soon as possible to avoid it going stale!


Hope you like it? I'd love to hear if you have your own homemade Valentines day treats. Thanks to Baking Mad for the ingredients for my recipe. Happy Valentines Day! Rebecca x

1 December 2011

It's beginning to feel a lot like Christmas - with a Hotel Chocolat giveaway!

Hello all, it's 1st December today, so I can officially start to think about Christmas! Not that I've had time to think about much else over the last month, not wanting to do things by half I've moved both house & office. But now everything is pretty much sorted it's time to focus on the festivities.

I was very excited to have the chance to be part of Hotel Chocolat Christmas campaign. I'm already a big fan of their chocolate, in particular tiddly pots & cherry deluxe....mmm! So when I was asked if I would like to sample one of the products from their 2011 Christmas range, I didn't need to be asked twice.
I chose a selection of Winter Dessert chocolates which included Apple Strudel, Chocolate Souffle, Christmas Mess & Caramel Pecan Pie. They are definitely chocolates to be savoured & utterly delicious. I preferred the souffle & pecan pie choc's, but that's just because I like darker chocolate. My mum, who I shared them with (it was more than my life was worth not to share!) loved them all, but she has a real sweet tooth. They would certainly make a lovely after dinner treat to enjoy with coffee & if you have guests, I'm sure you could entertain yourselves trying to guess the flavours. You may be surprised how like the dessert they actually taste!

Other things that have caught my eye from the range (family & friends take note :-) are tiddly caramel penguins & mulled wine cherries but really there's just too much to choose from.
I did think it a little bit mean just to write a post about me getting to try some delicious chocolate, so I have an early Christmas treat for you! I have another box of the Winter Dessert chocolates to giveaway to one lucky reader. All you have to do is take a look at the full Hotel Chocolat Christmas range & leave a comment telling me which treat you would like to find under the tree this Christmas.

You can also email your entry to rebeccabakescakes@hotmail.co.uk

Entries need to be in by 23:59 on Wednesday 7th December 2011. Winner will be chosen at random with the help of a random number generator!

Good Luck! Rebecca x

If you want to find out more about Hotel Chocolat you can follow them on Facebook & Twitter

All pictures courtesy of Hotel Chocolat

20 October 2011

Chocolate week, baking week, is there any week that isn't a week, cookies!

Hello. You may remember a few weeks back was National Cupcake Week, in honour of which I created some peanut butter & jam cupcakes. Well I posted a piccie of said cupcakes on the Baking Mad Facebook page & ended up winning a pack of orange flavour buttons which I probably got a bit too excited about. If you're not a fan already I'd recommend joining, they often run giveaways & competitions. The Baking Mad website is also worth a look for all things related to baking & cupcake making!

So they are the inspiration for this weeks recipe, which I created to celebrate both Chocolate Week (last week) & Baking Week (this week) It never ceases to amaze me the number of 'weeks' we actually have, although I feel there's a critical one missing. I think we absolutely have to have a 'National Eat Crisps Week' where every meal has to be accompanied by a potato based snack! Who's with me??

The orange buttons are made from cocoa butter & made a great cookie topping, I also added some natural orange essence to the cookie dough mixture to create the perfect chocolate orange cookie.

100g unsalted butter
140g caster sugar
1 egg
140g SR flour
25g cocoa powder
2tsps natural orange essence
Pack of Silver Spoon orange flavour buttons

1. Cream the butter & sugar until light & fluffy, then beat in the egg gradually until you have a lovely smooth batter.

2. Sift in the flour & cocoa powder & fold together, finally add the orange essence.

3. Place small dollops of cookie dough onto a baking sheet, add some buttons to the top. Don't worry it they look a bit squished, they'll spread out when the cook.

4. Bake in the oven at 180c/GM4 for around 10-12 minutes. Leave to cool completely & crisp up.

Looking at the finished article they would probably be quite good for a Halloween party if you were that way inclined? As my friend pointed out, there were a few of them that ended up looking like something out of the Mighty Boosh, google it, you'll see! Enjoy, Rebecca x

9 February 2011

Forever Nigella #2 - Chocolate Love Buns

I'm not normally one to get swept away with the whole Valentines Day hype, but this year I've decided to jump on the bandwagon & create a Valentines Day treat for the second round of the Forever Nigella blogging challenge hosted by Maison Cupcake

This months theme is Seduced by Chocolate & I did wonder if I could resubmit last months recipe. In case you missed it, it was Devils Food Cake & was about as chocolaty you could get! But that would be cheating & instead I made a variation on a recipe that was featured in Nigella's Feast book (my favourite!)

Love Buns seemed quite apt for Valentines Day, I've adapted them into Chocolate Love Buns, topping them with pink frosting & a dusting of shimmer!

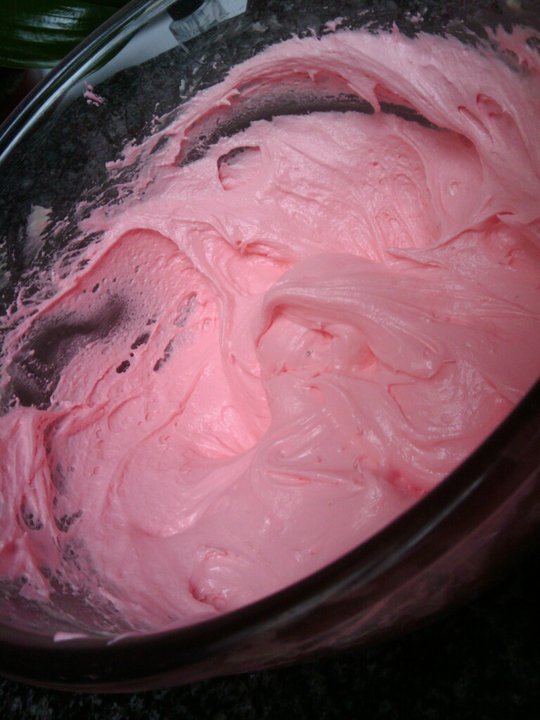
Click here to view Nigella's original recipe. For my variation I simply added 25g cocoa powder to the cake mix & a few drop of natural red food colouring to the frosting along with the vanilla essence. I love these & trust me they're not half as sweet as they look. The cake is deliciously soft & the frosting is so fluffy & light it could almost float off the top of the cake!


Hope you enjoy my Love Buns (makes me giggle like a 8 year old every time!) & maybe even make some for your Love Bunny this Valentines Day, beats shop bought any day!


Happy Valentines Day, Rebecca x

5 January 2011

Week 51 - Devils Food Cake

Happy new year everyone, hope you all had a lovely weekend & are looking forward to 2011. It seems a bit strange that as most people seem to be talking about fresh new challenges for the year ahead & new years resolutions, I'm about to bring my year long baking challenge to a close. Feel a little bit behind with things!

So this week I am baking to take part in a blogging event called Forever Nigella. I got a copy of her new cookbook, Kitchen, for Christmas so I thought this was a perfect opportunity to crack it open! I have quite a collection of her books & if I'm honest like to imagine myself as a bit of a Nigella in the kitchen. The reality is I don't look half as glamorous & usually have flour in my hair! Here's me at Christmas in my Mum's kitchen trying to do my best Nigella impression, complete with posh pinny & gin & tonic in hand!

The Forever Nigella event is hosted by Maison Cupcake, visit her blog to find out more details, but the idea is basically to pay homage to the Domestic Goddess by making & blogging about her recipes. Each month there will be a different theme, this month it's Seasonal Sensations, so there's loads to choose from. I've chosen to make Devils Food Cake as an indulgent treat to help ease me back into the work routine. I always find that post-Christmas can be a bit tricky, it's cold, daylight is in short supply so it's a good excuse for comfort food. I know everyone seems to be on a diet or detox, but lets face it, life's too short, so lets us eat cake! I'm not able to publish the actual recipe on my blog unfortunately, so here's a link to it as featured on the BBC Food website. Devils Food Cake was featured in episode 12 of Nigella Kitchen on BBC1


This is the most delicious, indulgent chocolate cake I have ever made & I love it as it's not sickly sweet as some milk chocolate cakes can be. My only challenge now is how on earth do I get it off the cake stand & into a tin?? Oh well might just have to eat it...can't have it going stale! See you next week for the Rebecca Bakes Cakes 52nd week finale! Rebecca x

8 December 2010

Week 47 - Florentines

Blimey it's cold! Hope you're managing to stay warm & haven't been snowed in, we've had rather pathetic flurry in the Royal Borough so sadly no snow days for me :-( I'm very excited that the Windsor Ice Rink returns this year! It's in Alexandra Gardens in the centre of Windsor, right by the banks of the river, it's a beautiful setting & sure to make you feel in the Christmas spirit. It opens this weekend, take a look at the website for opening times & booking information.

So I'm launching into full on foodie prep for the festive season & this weeks recipe has become a bit of an annual tradition. I really like making foodie gifts at Christmas & these are perfect to take to dinner or a party as a thank you gift. Last year I also made Santa cookies for my friends at work, the idea was to leave them for Santa on Christmas Eve, but if I'm honest I don't think many of them made it out of the office! Florentines are really easy to prepare, but if I'm honest once they come out of the oven they are a little fiddly to finish. But have patience & it'll be well worth it in the end!

150g butter
150g light brown sugar
100g flaked almonds
50g chopped nuts
40g mixed peel
100g glace cherries
100g raisins
150g dark chocolate, melted

1. Melt the butter in a pan, stir in the sugar & heat gently until it dissolves & just starts to bubble. Take off the heat & stir in all the other ingredients.

2. Line a baking sheet with baking paper & place small dollops of the mixture, leaving space in between for them to spread. Bake in the oven at 180c/GM4 for 8-10 minutes.

3. Lift out the oven, slide the paper off onto a wire rack for the florentines to cool. Line the tray with fresh paper & spoon out the next batch.

4. Once all cooked & completely cooled, carefully peel them off the paper, you might need to slide a knife underneath to help. Place them face down on the paper & cover the bottom with the melted chocolate & leave to set.

When the chocolate was completely set I packed them into sellophane gift bag. I bought mine from Morrisons supermarket, but did also notice them in Sainsburys. They were around £2 for a pack of 10, with ribbons & I just added a simple silver gift tag. My batch made 28 florentines, but you could easily half or double the quantities depending on how many you need. Enjoy! Next week I think I'll be trying my hand at some baking construction, until then, Rebecca x


1 December 2010

Week 46 - Red Velvet Cupcakes

Pinch & a punch for the first of the month, it's December so the Christmas countdown starts today! The tree will be going up at the weekend & I'm really looking forward to the party season. We're starting early with our work do tomorrow evening, outfit is sorted, nails are done, just need to work out how exactly you use a velcro roller & I'm ready to go. I bought a gorgeous new pair of heels which are pretty much sky scrapers, even by my standards. I've been off work today so thought I'd better try them out, you should have seen me, teetering round the house in my jammies & a pair of 4 inch heels, actually it's probably best you didn't see me! They're remarkably comfy, but I think as back up I should try & get a pair of those fold able ballet pumps to stick in my handbag...I have a feeling I might have to abandon the stilts at some point!

So entries to my second giveaway closed yesterday & thanks to the random number generator I'm happy to announce the Kel of Writings, Ramblings & Reviews is my lucky winner! Well done Kel, I hope you like the mugs, given the Arctic conditions I hope you enjoy using them to warm up with a nice hot brew? With only 6 weeks left to go in my baking challenge, I'm hoping I can bring you a finale giveaway soon...watch this space.

This weeks recipe is something that I've wanted to try for quite some time & comes from the very beautiful Hummingbird Bakery Cookbook. The red velvet is created by mixing together red food colouring with cocoa powder & vanilla essence to form a paste. Word of advice, do not mistake this as melted chocolate & lick the spoon...eh Mum? I baked this week at my Mum's house & before I could stop her she did exactly that, looked like she'd gone all vampire like & had to spend 20 minutes brushing her teeth!

For the cakes
60g butter
150g caster sugar
1 egg
10g cocoa powder
20ml red food colouring
1/2tsp vanilla essence
120ml whole milk
150g plain flour
1/2tsp salt
1/2tsp bicarbonate of soda
1 1/2tsps white wine vinegar

For the frosting
300g icing sugar
50g butter
125g cream cheese

1. Beat together the butter & sugar until light & fluffy, then beat in the egg. Mix together the cocoa powder, food colouring & vanilla until you have a smooth paste. Add this to the butter mixture & beat well until all combined.

2. With the mixer on a slow speed, beat in half the milk, then half the flour. Repeat with the remaining ingredients until you have a lovely smooth mixture. Finally add the salt, bicarb & vinegar, then turn up the mixer & beat well for a couple of minutes.

3. Line a 12 whole bun tin with paper cases & fill each about 3/4 full with mixture. Bake in the oven at 170c/GM3 for around 20-25 minutes until well risen & springy to the touch. Leave to cool in the tin.

4. To make the frosting, beat the icing sugar & butter together, then add the cream cheese & beat for around 5 minutes until fluffy, spread this frosting all over the top of the cakes when cool.


These are really delicious & as the name suggests, have a lovely velvety texture! Have a good week, I'm giving my Christmas cake it's final drink of brandy before tackling the decorations! See ya, Rebecca x

10 November 2010

Week 43 - Viennese Biscuits

Afternoon folks, I've had a day off today so I'm feeling all relaxed & am writing this with a cup of tea & one of this weeks biccies! Can you believe that I'm in to the final 10 weeks of my blogging challenge. It's gone so fast, but I'm wondering what to do with all the recipes I've tried over the year? A book maybe? :-) For now I have to concentrate on the final 9 recipes, if anyone has any suggestions please let me know...

This week I had some good news, the blog has been nominated in the Dorset Cereals Little Blog Awards! It's a monthly award & voting takes place throughout November. So if you like my blog & enjoy reading then please vote & spread the word. You could also be in with a chance of winning a delicious Dorset Cereals goodie bag too! Click here to vote or follow the link on the right, thank you x

I thought we'd go all continental like this week with a Viennese Biscuit, they were meant to be Viennese Fingers but it didn't quite go to plan! These were really easy to make, they're pretty much a very short shortbread & this recipe came from my vintage Be-Ro book. Once you've made the mixture, you are meant to put it into a piping bag with a rosette nozzle & pipe 6cm strips of mixture onto a baking tray. Well I have a piping gun & could not for the life of me squeeze anything out of it as the mixture was so stiff, so I popped it in the microwave for 10 seconds! That seemed to do the trick, but rather than keep their traditional spiky shape, as soon as I put them in the oven they flopped into a splat!

150g butter
50g caster sugar
150g self raising flour
Few drops vanilla essence
100g plain chocolate

1. Cream together the butter & sugar, make sure it's really well beaten & soft.

2. Stir in the flour & vanilla. Scoop it into a piping bag or gun & pipe 6cm strips onto a baking tray lined with baking paper. Bake in the oven at 160c/GM3 for 15 minutes until just golden.

3. Leave to cool & crisp up, then melt the chocolate & dip one end of each biscuit.

So they may not have the shape of the shop bought ones, but they are delicious none the less. Let me know if or how you managed to get yours to keep their shape! Have a good week, don't forget to vote, Rebecca x

28 October 2010

Week 41 - Chocolate Raspberry Muffins

Hello, how are we all this week? I can't believe how quickly the weeks are whizzing by & to be honest I've been so busy with the day job there's nothing much exciting been happening! So this week I've decided to stay true to the cake & just share this weeks recipe with you. Oh & by way of a public service announcement, don't forget the clocks go back this Sunday, an extra hour in bed...yey!!

125g butter
200g caster sugar
2 eggs
175g plain flour
1tsp baking powder
1tsp bicarbonate of soda
35g cocoa powder
250ml greek yoghurt
100g raspberries (fresh or frozen)

1. Melt the butter, beat in the sugar then the eggs, finally stir in the yoghurt.

2. Sift in the flour, baking powder, bicarb & cocoa powder & fold the ingredients together.

3. Line a bun tin with paper cases & spoon in the mixture. Finally sprinkle the raspberries over the top of each muffin & bake in the oven at 180c/GM4 for around 20 minutes. Leave to cool in the tin for a few minutes, then lift out onto a rack.

I think these are delicious, the sharp raspberries really balance the sweet chocolate & the yoghurt gives them a lovely soft texture. Hope you enjoy them! Don't spook yourselves too much this halloween & I'll see you next week with a bonfire night treat, not strictly cake, but something I've always wanted to have a go at making! Until then, Rebecca x

15 September 2010

Week 35 - Mars Bar Cupcakes

Evening! I'm back from Belgium just long enough to rustle up this weeks recipe. I also bring good news! You may remember a while back I created a recipe for Malteser Cookies for a competition that was being run by MyDish. Well sadly I didn't win, so no shiny new Kitchen Aid mixer for me, but I was a runner up! That means I have a parcel of chocolate goodies heading my way...as if I didn't have enough calories to deal with every week :-) Here's the link to the original post, it's a dead simple recipe to make, so why not have a go yourself?


You may have noticed that this week is National Cupcake Week (it's also Scottish Food Fortnight & Organic Food Fortnight!), so it only seemed right to make some sort of cupcake. Sweeties have often been a source of inspiration for recipes so this week I'm paying homage to the good old Mars Bar. I found them great to bake with, the nougat bit stays soft, but the caramel turns into lovely chewy toffee. Yum!


For the cakes
60g butter
100g caster sugar
1 egg
Few drops of vanilla essence
300g plain flour
1tsp baking powder
1tsp bicarbonate of soda
100-150ml milk
2 Mars Bar Duo's chopped into small chunks

For the topping
80g plain chocolate
2tbsp icing sugar
Dash of milk
1 bag Mars Planets

1. Melt the butter, stir in the sugar, then beat in the egg. Fold in the flour, then add the milk a little at a time until you get a dropping consistency. Finally stir in the chopped up Mars Bars.

2. Line a 12 hole bun tin with paper cases & spoon in the mixture. I made 18 cakes, so had to bake 2 batches. Bake in the oven at 180c/GM5 for around 10-12 minutes. Lift out, leave to cool for a minute, then transfer to a rack.

3. To make the topping melt the chocolate, then stir in the icing sugar adding a little milk to make it smooth. Drizzle over the top of each cake, then top it off with a Mars Planet sweet.

Hope you enjoy what's left of National Cupcake Week, it's a good excuse to eat cake I guess! I'm off to Holland again next week & will be on a mission to get a traditional recipe for Dutch Apple Cake from one of my colleagues. Till next week, Happy Baking, Rebecca x

28 July 2010

Week 28 - Whoopie Pies

So Whoopie Pies are apparently the new cupcake & in my quest to stay at the cutting edge of baking trends *ahem* I've had a crack at making them this week! By the wonders of the internet I have discovered the following things about Whoopie Pies...

1. They originated in the Pennsylvanian Amish community

2. Amish wives would bake them & put them in their husbands lunchboxes, when they discovered the treats they would shout WHOOPIE (I can't imagine a Brit husband getting quite so excited about finding a custard cream!?)

3. The tradition of using Marshmallow Fluff for the filling came from the manufacturers of Fluff featuring it in a Whoopie Pie recipe included in a 1930's cookbook called Yummy Book (I'd love to get hold of a copy of that!)

When I was researching what should go into a Whoopie Pie, I got a bit baffled by all the different options. This recipe was kindly sent to me by Roddas Cornish Clotted Cream & they have given them a distinctly Cornish twist, suggesting you fill them with their cream. I think that sounds like a great suggestion, but for my first attempt I'm staying true to the original & have chosen to make the traditional fluff filling. This part of the recipe is taken from the Marshmallow Fluff website. I chose to use Strawberry Fluff as I thought it would complement the chocolate & the fact it's the most amazing shade of pink!

For the cakes
100g unsalted butter
185g muscovado sugar
1 egg
300g plain flour
1tsp baking powder
1tsp bicarbonate of soda
1tsp vanilla extract
100-150ml milk

For the filling
1/2 jar of marshmallow fluff
130g icing sugar
100g butter
Dash of milk

1. Cream together the butter & sugar, then beat in the egg & vanilla.

2. Sift together all the dry ingredients, then add about half to the butter mixture along with about half the milk, mix well. Add the remaining half of the flour etc & enough milk to make a smooth mixture of dropping consistency.

3. Grease a baking sheet & place on small dollops of the mixture, leaving plenty of space in between for them to expand. I made 24 individual cakes from 1 batch. Bake in the oven at 180c/GM5 for 12-15 minutes until well risen & springy to the touch. Place onto a wire rack to cool completely.

4. To make the filling, cream together the butter & icing sugar, adding a little dash of milk to help it along, then beat in the Marshmallow Fluff until all combined. Match up the cakes into pairs, then use the fluffy filling to sandwich them together. I also added a drizzle of melted dark chocolate to the top!

These are quite possibly the most amazing thing ever! Delicious! They are pretty large, so unless you're feeling hungry I'd suggest sharing one with a friend over a glass of ice cold milk! Hope you enjoy making your own Whoopie *sniggers* I'll hopefully see you next week, I've booked a last minute trip away, so I'm hoping the technology will mean I can keep my unbroken record for a 29th week...until then, Rebecca x

20 July 2010

Week 27 - Daim Bar Birthday Brownies

Good news! I have a new fridge, so I'm no longer having to survive on tinned food & frozen veg. Not that there's anything wrong with tinned food & frozen veg, but not being able to have milk for a cup of tea was sure to test any ones patience! All in all it's been a much calmer week in the kitchen, although I swear my toaster is still trying to kill me :-)

Now we're over the half way point of my blogging challenge, it got me thinking back to when I first started & I went back to read some of my early posts. It's made me realise how much I enjoy writing each week & receiving comments about my creations. (The baking's not been too bad either!) But it also made me feel a little sad to think what I might do when I reach week 52, do I just stop writing? Now I've released my inner writer I want to keep on going! Maybe I need to think of a new foodie challenge to embark on, but maybe one that is less calorific! For now though I'm happy I've got another 25 weeks to go...so bring on this weeks recipe.

I created this recipe for my Mum as it's her birthday this week. She has a super sweet tooth so I thought brownies would hit the spot! Rather than using the traditional walnuts, I thought I'd have a go with bashed up Dime bars. Sorry, Daim bars! (Yes I am old enough to remember when Snickers were Marathons, Starburst were Opal Fruits & Daim Bars were Dime Bars...armadillos!) It gives them a lovely almondy crunch & the sweetness offsets the bitterness of the dark chocolate. I thought of this after making the Malteser Cookies a couple of weeks back, sweeties are a good source of recipe inspiration for me!

50g plain chocolate
65g butter
175g caster sugar
2 eggs
Few drops vanilla essence
50g plain flour
1/2tsp baking powder
3 Daim bars bashed up

1. Melt together the chocolate, butter & sugar in a large bowl. Beat in the eggs & vanilla, then finally fold in the flour, baking powder & Daim bar pieces.

2. Line a baking tin approx 15cm square with either baking parchment (just don't set fire to it like I did!) or foil to stop the brownies sticking. Pour in the mixture & bake in the oven at 180c/GM4 for around 30-35 minutes until the top just starts to crack.

3 Leave to cool in the tin, then lift out & cut into squares.

So there you have it, Birthday Brownies (sparkler optional!) Happy Birthday Mum! Hope you like them & you enjoy our day in the big city being ladies what lunch xx

See you all next week, Rebecca x

6 July 2010

Week 25 - Malteser Cookies

Hey hey, I'm back from my weekend camping feeling very chilled & ready to bake some more! We had fab weather in the New Forest & amazingly the campsite sold bags of ice, so panic over, there was no problem keeping the Rose chilled. We did go horse riding & yes I did announce to the rather confused group, 'I'm on a horse!' It seems getting off a horse is harder than getting on though & I performed the most ungraceful dismount, catching my back leg on the saddle & pretty much coming off head first. It's ok, I don't think anyone noticed! I also didn't realise there were wild ponies in the forest? It's a bit odd how they just roam around the place, one came right up to us & practically sat on our picnic blanket, we did offer him a beer but he wasn't that interested & wandered off again. I did enjoy camping & had a lovely time, but I admit I was happy to be back in my bed!

So next week marks a milestone for the blog, I hit the half way point in the baking challenge. It's been a lot of fun baking & writing each week, as well of course being able to share the fruits of my labour. I've had such lovely support & encouragement from everyone, I wanted to do something to say thank you. So this Friday I'm hosting the first ever Rebecca Bakes Cakes tea party! I have a special 1/2 birthday cake planned, as well as lots of other sweet treats & probably not an insignificant quantity of Pimms. If you're in the area let me know, pop in & say hi! Full report next week...

So on to this weeks recipe & it's something I've created for a competition that's running on mydish.co.uk The challenge is to create a recipe using Maltesers. Now putting them in cookies may not seem like the most creative use of Maltesers, but I've never come across it before & to be honest it was a bit of a gamble as I didn't know how they'd hold up in the oven? Simple, but effective I think!

55g butter
120g soft brown sugar
1 egg
Few drops of vanilla essence
140g plain flour
1/2tsp bicarbonate of soda
135g Maltesers (bashed up a bit!)

1. Cream together the butter & sugar, then beat in the egg & vanilla essence

2. Stir in the flour & bicarb, then finally the Maltesers. Spoon dollops of the mixture onto a baking tray, leaving space for them to spread, I got 12 cookies from a batch. Bake in the oven at 180c/GM5 for 12-15 minutes. Leave to cool on a wire rack

I'm quite chuffed with the outcome, the Maltesers go even crunchier in the oven, so you get a delicious cookie with little bites of malty loveliness! I think to make them even better, next time I'd also add a handful of mini marshmallows. The competition closes at the end of the month so we'll have to wait & see how my cookies compare?

Ooo...before I forget, does anyone know where I can find Marshmallow Fluff in London? I'm desperate to try Whoopie Pies, but this is a vital ingredient I'm missing. Well time to say goodbye for another week, take care, Rebecca x

8 June 2010

Week 21 - Black Forest Gateau

Aloha cakies! How are you all? I'm so excited, I'm off to the south coast this weekend to attempt to learn to surf! I've never even so much as body boarded before & have a serious case of wet suit fear...I mean how on earth do you get yourself into one? Thankfully I'm a fairly strong swimmer so I'm hoping I won't drown myself, but I think there's probably only an outside chance of me actually getting upright on a surf board. But you never know, I might take to it like a duck to water & transform myself into a surf babe worthy of a part in Blue Crush! It's going to be a lot of fun with a packed schedule, we've got surf lessons & yoga, think I might need another holiday to recover!

So, it's been a while since I've baked what I'd call a proper cake, so I thought I'd have a crack at a 70's classic, Black Forest Gateau. It ended up being a bit of a feat of engineering to construct, but I hope you'll agree it looks impressive (if not a little hap-hazard!). I think the original recipes suggested using tinned cherries, but I really struggled to find them. Instead I made my own cherry compote, it takes a bit of time but is well worth the effort. I didn't want to buy Kirsch so sneaked in a little bit of brandy to give it a kick!

For the cakes
225g butter
225g sugar
4 eggs
225g plain flour
25g cocoa
2 tsp baking powder

For the filling
300g cherries
100g soft brown sugar
50ml brandy (optional)
50ml water
300ml whipping cream

1. Cream together the butter& sugar, then beat in the eggs until light & fluffy. Sieve in the flour, cocoa & baking powder, fold together until all combined. Grease 2 sandwich tins & divide the mixture between them. Bake in the oven at 190c/GM5 for around 20 minutes. Leave to cool in the tin, then tip out onto a rack.

2. Cut the cherries in half & remove the stones, this is a bit fiddly & you will end up with pink fingers! Keep a few fresh to decorate the top with. Put the stoned ones in a small pan with the sugar, water & brandy, give it a good stir. Put it on a gentle heat & bring it up to the boil. Simmer until the mixture has reduced by half & the liquid has thickened into a light syrup. Put to one side to cool.

3. Whip the cream until it forms soft peaks, then slice each of the cakes in half, I find it easiest to use the bread knife to do this. Now starts the construction! Place a base layer of cake, drizzle a little of the syrup over the top, then add a layer of cream, a scattering of cherries & another layer of cake. Repeat this pattern until you pop on the top, then add a final topping of cream & a few more fresh cherries to decorate.

This is a delicious gooey tower of chocolate, cherry & cream. For the full effect I feel like I should be presenting it on a hostess trolley! Only problem is I'm wondering how I'm going to fit it into the fridge? Oh well, might just have to eat it instead! Maybe this could be the first in a series of Euro inspired cakes? Germany can't be the only one with a famous cake? Well for now, auf wiedersehen, wish me luck for surfing & I'll see you all next week. Take care, Rebecca x

1 June 2010

Week 20 - Rock Buns

Notice anything different about the blog this week? Yes, we've had a bit of a bank holiday makeover! The blogger template was great to get me going, but now I've found my feet a bit with this blogging malarkey I thought it was time for a new look. The design comes from a great site called www.yummylolly.com. It's run by a fab designer who has been kind enough to share her blog templates for free! I loved her designs & found it tough to pick a favourite, it's great, with this new look I feel like a proper blogger now!

This weeks recipe was a suggestion from Our New Life in the Country & it got me thinking back to some of my earliest memories of cooking in home economics at school. The first thing I think we ever cooked at middle school was potato pie. Now from what I remember 'pie' was used in the loosest sense of the word, we basically made mashed potato, tipped it into an oven dish & topped it with grated cheese! I feel sorry for my Mum & Dad who were probably made to eat it, having to make the appropriate noises of appreciation! I do also remember baking at school & have the battle scars to prove it. One week I came home from school with my arm wrapped in cling film after dropping a baking tray out the oven onto my arm. Unfortunately my clumsiness seems to have got worse with age & I'm still a bit of a liability in the kitchen!

I'm sure we made rock buns at school, the traditional ones with mixed peel & sultanas. But keeping with the makeover theme for this week, I thought I'd try a new more grown up version, see what you think?

100g butter
50g light brown sugar
1 egg
225g self raising flour
100g fudge
100g milk chocolate
Dash of milk

1. Cream together the butter & sugar, then beat in the egg until it's all light & fluffy

2. Chop both the fudge & chocolate into small chunks (or use chips instead), add them to the mixture along with the flour. Fold it all together until it combines to a stiff dough, use a little dash of milk to help it along if its a bit too dry

3. Line a baking tray with greaseproof paper & place on small dollops of the mixture leaving a gap to allow them to spread. I made 12 rock buns out of a batch

4. Bake in the oven at 200c/GM6 for 10 minutes until they have just started to brown on the top. Leave to cool completely, then peel them off the paper.

I'm really pleased with the result, the fudgy bits on the top have melted into delicious caramel gooeyness & the cake itself is lovely & crumbly! I hope you like the new twist on an old classic? However if you're a bit of a traditionalist & want to stick to the classic, then simply substitute the fudge & chocolate for 150g of mixed fruit & a good pinch of mixed spice. Right I'm off to research food processors, managed to break mine in the process of this weeks baking...what was that about liability in the kitchen?? Till next week, Rebecca x

5 May 2010

Week 16 - Millionaire's Shortbread

Hello, hope you all enjoyed the long weekend? I managed to time it perfectly & take advantage of the 5 hours of sunshine we did actually get! I completed my final long training walk on Saturday, 18 miles in 4.5 hours. So that's it, training done, I'm ready for the Moonwalk & I can't wait for the 15th May. I'm just hoping my feet heal in time, I'm still having problems with blisters & there doesn't seem to be enough compeed plasters in the world to help. I've even taken to padding around the office barefoot to avoid shoes making them worse! If anyone has any tried & tested methods to fix blisters, please please let me know, I've only got 10 days to go.

This weeks recipe is a request & one of my favourite sweet treats. I used to buy it ready made from the supermarket & always thought it would be really difficult to make at home? I came across this recipe in the Christmas edition of Olive magazine & thought I'd have a go! It's easier than you might think, it just takes a little time as you have to allow for cooling in between layers. That said, the result is amazing & I'll never go back to the shop bought stuff! Piccie will follow, my chocolate topping hadn't quite set yet!

Shortbread
50g caster sugar
150g butter
200g flour

Caramel

225g caster sugar
142ml double cream
25g butter

Topping
200g dark chocolate
40g butter
60g white chocolate

1. Blitz together the flour, sugar & butter in a food processor until you get a soft dough. Line a tin approx 20cm square with baking paper, leaving an overhang to make it easy to lift out of the tin. Tip the dough into the tin & firmly press down so it's evenly spread. Chill for 10 minutes, then bake in the oven at 160c/GM4 for 35 minutes until golden brown. Leave it to cool completely in the tin

2. To make the caramel, place all the ingredients into a pan & over a gentle heat bring it up to the boil until the sugar has dissolved. Simmer rapidly for about 30 minutes, it's tricky to know when it's ready, but I'm told you should drop a blob of caramel into a glass of water, if it stays together, it's done!

3. Once the base is cool, pour the caramel over the top & leave it to cool completely. Melt the dark chocolate & butter together, then pour over the caramel. Leave to set, then melt the white chocolate & drizzle over the top. Once it's all set, you can use the paper to lift it out of the tin & cut it into chunks

There's something really satisfying about making Millionaire's Shortbread, maybe because of the time that goes into it! The request came from my boss, who is leaving us (temporarily) to have a baby. So, I hope you enjoy it Kerry & that baby makes a safe arrival in the not too distant future! I have also made an alternative cake to mark the occasion, but as that's a surprise for Friday, I'll tell you about that next week. Right cake done, it's on to bra decorating for the Moonwalk...it's a very creative week! Enjoy, Rebecca

p.s. I'm not really sure if anyone is still reading this? If you are, make yourself known please :-)

28 April 2010

Week 15 - Espresso Biscotti

Phew! Well I made it back from holiday, but I have to be honest I wasn't sure we would! We were pretty much the last flight to leave the country the day the volcano started to erupt, so we were lucky to get away in the first place. We had a lovely week in the Egyptian sun & then a bonus 4 days waiting for a flight home. Thankfully we didn't have to move hotels & we got upgraded to all inclusive, so it wasn't all that bad being stranded! But it's back to reality with a bump & straight back into work. It's also only just over 2 weeks away from my Moonwalk Marathon, yikes! The good news is the sun & sea has really helped to heal my feet, which were starting to wear themselves out, so I'm raring to go again & there's a daunting 20 miles planned for this weekend! Thank you to everyone for their support so far, there's still time to sponsor me if you would like to help Walk the Walk & the fantastic support they give to breast cancer charities all over the country.

You can find my sponsorship page at www.walkthewalkfundraising.org/rebecca_hodgson_mw

So, on to this weeks recipe & I thought I'd try creating a recipe using another of my fav Green & Blacks choccie bars. I've used the Espresso dark chocolate to create a delicious crunchy biscotti. The first time I made biscotti I was surprised at how easy it was, it's just a bit fiddly as you have to cook it twice. Apparently biscotti actually means twice baked in Italian? (Need an Italian to confirm that for me!) There are lots of different flavours you could try, almonds, dried fruit, chocolate whatever you like really. I think Espresso is a great variation & perfect with a cup of coffee!

250g plain flour
200g caster sugar
100g bar Green & Blacks Espresso chocolate chopped into small chunks
1 tsp baking powder
Pinch of salt
3 eggs
Few drops almond essence

1. In a large bowl, mix together the flour, sugar, baking powder, salt & chocolate chunks

2. Beat the eggs with the vanilla essence, then add a little at a time to the dry ingredients & mix until it's all combined into quite a stiff dough. If it's proving tricky you can always add a tiny dash of milk to help it along

3. Tip the dough out onto a floured surface & roll it into a sausage shape. I ended up making 2 sausages as it made it a bit easier to handle! Place them onto a baking sheet lined with parchment & bake in the oven at GM3/150c for 30 mins

4. Take them out the oven & leave to rest for 5 minutes. Then using a sharp knife slice the sausages on the diagonal, to make biscotti about 2cm thick. Place them back on the tray & pop into the oven for another 15 minutes. They'll still feel a little soft when you take them out the oven, but will crisp up when cool

So there you have it, delicious biscotti! I like to dunk mine in my coffee, Douwe Egberts coffee of course!! Enjoy, next weeks recipe is a request & it's going to be a goodie, see you then! Rebecca

30 March 2010

Week 11 - Easter Nests

Easter Greetings Chooky Eggs!

So it's almost the Easter weekend & if you're like me, you'll be looking forward to a few days off? Now I thought the start of BST signals the start of spring, light nights, sunny evenings in the pub & a feeling of renewal, what with all the daffodillies & lammie mares! But we live in the UK, so lets not get carried away...what we've actually got is a severe weather warning for sleet & gale force winds hell bent on destroying the sturdiest of brollies! Hoary! Bring on the chocolate!

As well as
baking this week, I thought I'd go a bit arts & crafts & have a crack at decorating an egg. I haven't done this since my triumphant victory in the Alnwick Egg Competition in 1986 (aged 8) with my eggy Adam Ant! (Mum, why did you not take a picture?) Now it would seem my creativity when it comes to egg decorating has faded in the last 24 years. But I'm quite chuffed with my little egg, I've called her Henrietta!

So this weeks recipe is also Easter themed, although it's so easy to make I feel a bit of a fraud calling it baking...

150g milk chocolate
50g butter
3 shredded wheat
Mini eggs to decorate

1. Melt the butter & chocolate together in a large bowl & mix well. Crush the shredded wheat into the bowl & mix well, you might need to squish it together with the back of a spoon to get it all to combine

2. Spoon a generous dollop of the mixture into a paper case & press down gently, then add a couple of mini eggs to finish off

3. Let them set, you can either leave them in paper cases, but I like to take them out so you can get the full effect of the nest!

See told you it was simple! Hope you can take some time to make these over the long weekend & if anyone has a go at egg decorating, I'd love to see piccies. This weeks batch of goodies are going to a good cause, we're having a charity cake sale today at work, I'll let you know how much we raise next week. Enjoy the break, back next week, Rebecca

7 March 2010

Week 8 - Chocolate Ginger Cookies

I'm feeling a little delicate this week, so be nice cake mates. Training was completed as planned, but with hindsight, going out dancing in 4 inch heels the same day as completing a mammoth 11 mile walk was probably not my best decision ever! Now I have been known to abandon my shoes when out dancing, but on Saturday, for the first time ever, I was asked by security to put my shoes back on. Apparently dancing barefoot poses a health & safety risk! I would argue that me, slightly squiffy, dancing on 4 inch heels presents more of a risk than barefoot, but who am I to argue with a security professional? Needless to say my legs are a bit sore, although some treatment from my fab physio, Zdena on Monday means I should get out training again tomorrow. As my Mum would say, those mile won't walk themselves!

So, this weeks recipe is definitely one for chocolate lovers, sorry I realise this really isn't helping those of you who have given it up for Lent! I love Green & Blacks chocolate, so I've decided to create a series of recipes using some of their fab choccie bars. The first one uses the Dark Chocolate with Ginger, which is probably my favourite of the lot. The result is a really intense chocolate cookie that's lovely & chewy in the middle, perfect with a big mug of coffee!

100g butter
140g light brown sugar
1 egg
140g plain flour
25g cocoa powder
1/2 tsp bicarbonate of soda
1/2 tsp ground ginger
100g bar Green & Blacks Dark Chocolate with Ginger

1. Cream together the butter & sugar, then beat in the egg until you get a smooth mixture

2. Sift in the flour, cocoa powder, bicarb & ginger, then give it a good mix until it is all combined. You'll end up with quite a thick cookie dough

3. Next roughly chop the chocolate so you have small chunks, stir these in the the dough until they are fairly evenly spread

4. Spoon small dollops of the dough onto a baking sheet, they will spread, so give them some room, I got around 20 cookies out of my batch. Bake them in the oven at 180c/GM5 for around 10 minutes until they have lightly risen & the tops just start to crack

5. Leave to rest for a few minutes once out of the oven, then transfer to a wire rack. They might seem a little soft still, but will firm up once completely cooled

I think the next G&B recipe will use my second favourite bar, Milk Chocolate with Butterscotch. After that I'm just not sure, there's too many to choose from! If anyone has any requests, let me know. Next week, get your leg warmers & double denim at the ready, we're going back to the 80's with retro party cakes. Have a good week cookie monsters! Rebecca
Showing posts with label chocolate. Show all posts

22 May 2012

Very very chocolately cookies from Cox Cookies & Cake

Over the last few years as my baking habit has grown, so it seems has my collection of cook books, most of which I have very gratefully recieved as gifts. I love looking through them for inspiration & to drool over the pictures, but if I think about it, it's not that often I actually choose a new recipe from a book & try it out. I have my staple recipes that I pretty much know off by heart, then the rest is a series of experiments, some more successful than others!

So I've decided to branch out, broaden my repertoire & try out at least one new recipe from each of my books. The first is from Cox Cookies & Cake, a collaboration beween baker Eric Lanlard & the designer Patrick Cox.  The book is a technicolour spectacular divided into themed chapters, my particular favourite is the Styling Cupcakes section.  Although where one is meant to find a beach bum mould & skin-coloured edible paste I have no idea, (Cheeky Cupcakes on page 100 if you get a chance to look at the book!)

Easing myself gently into this somewhat eccentric cook book, I decided to make double chocolate & marshmallow cookies, the Man Cakes (page 108) will have to wait for another day.


They really should be called Choc as much choc as you can into a cookie cookie.  They have melted chocolate, cocoa powder & chocolate chips in them, topped off with a good drizzle of melted marshmallow.  The texture was quite cakey rather than crunchy cookie, but oh my god they tasted good!  Next on the hit list for this book is the Orange Marmalade Cupcakes, it's worth a look if you want some more unusual ideas & if anyone knows where I can find a torso mould let me know :-)  Till next time, Rebecca x 


9 February 2012

Hunk a chunk of choccy love!

I'm not one to get swept away in the commercialism of Valentines Day (that might sound strange coming from a marketeer!) I find it a bit overwhelming the variety of items that are Valentinised all in a bid to 'get us in the mood'. How slapping a few hearts & flowers onto a standard supermarket product is meant to do that I just don't know? That's not to say that I ignore the day, but I'd rather make something myself that feels more personal & special. As is the case for most occasions, I usually bake!

Last year I took part in a Forever Nigella challenge & tried out her recipe for Love Buns (still makes me giggle!) Click here to take a look back at that post.

So keeping with the competition theme, this year I was invited by Baking Mad to go head to head with 14 other bloggers. The challenge was to create my ultimate Valentines treat, using a minimum of 3 ingredients from a mystery box of goodies I was sent.

Where to start? What to bake? Cake? Biscuit? Brownie? Cupcake? Arrghh...too many options! Then inspiration struck me! Now bear with me on this explanation, I'm not even quite sure how exactly my brain worked it's way round to this...

I was listening to my ipod on shuffle, the Elvis track Burning Love came on. If you're not familiar with it, at the end of the song there is a section that goes, 'hunk a hunk of burning love'. My head was singing 'hunk a chunk of burning love', which made me think of chocolate, which lead me onto Rocky Road...et voila, this weeks recipe! In honour of it's inspiration I have named it,

Hunk a Chunk of Choccy Love

The ingredients I selected from my ready steady cook style package were:

A large bar of chocolate
Chocolate heart sprinkles
Giant white chocolate snowies
Pink shimmer balls
Dark chocolate melt & squeeze topping
White chocolate letters

To these I also added:

150g unsalted butter
200g shortbread biscuits (bashed up a bit into chunks)
50g sultanas
50g glace cherries
1tbsp golden syrup

1. Melt the butter, chocolate & syrup together. Stir in the bashed up biccies & fruit & stir well until all combined.

2. Line a dish with baking parchment, pour in the mixture & press down firmly. Leave in the fridge to set for 20 mins.

3. Melt the topping & spread evenly over your base, decorate at will! Pop back into the fridge to set fully.

I didn't leave mine to set for long enough before adding the topping, so some of the butter from the mixture rose up through the topping, making a bit of a mottled effect on the top. Hasn't effected the taste at all, but you might be able to see from the picture it meant the top looked a little uneven.


When it was set solid, I took the slab out of the dish & paper, wrapped it in fresh baking parchment & tied it up with a ribbon!


What I really like about this (other than it's delicious chocolatey biscuity loveliness) is you can cut a chunk as big or as small as you fancy & it lasts for ages in the fridge. It's not like cake that I feel compelled to eat as soon as possible to avoid it going stale!


Hope you like it? I'd love to hear if you have your own homemade Valentines day treats. Thanks to Baking Mad for the ingredients for my recipe. Happy Valentines Day! Rebecca x

1 December 2011

It's beginning to feel a lot like Christmas - with a Hotel Chocolat giveaway!

Hello all, it's 1st December today, so I can officially start to think about Christmas! Not that I've had time to think about much else over the last month, not wanting to do things by half I've moved both house & office. But now everything is pretty much sorted it's time to focus on the festivities.

I was very excited to have the chance to be part of Hotel Chocolat Christmas campaign. I'm already a big fan of their chocolate, in particular tiddly pots & cherry deluxe....mmm! So when I was asked if I would like to sample one of the products from their 2011 Christmas range, I didn't need to be asked twice.
I chose a selection of Winter Dessert chocolates which included Apple Strudel, Chocolate Souffle, Christmas Mess & Caramel Pecan Pie. They are definitely chocolates to be savoured & utterly delicious. I preferred the souffle & pecan pie choc's, but that's just because I like darker chocolate. My mum, who I shared them with (it was more than my life was worth not to share!) loved them all, but she has a real sweet tooth. They would certainly make a lovely after dinner treat to enjoy with coffee & if you have guests, I'm sure you could entertain yourselves trying to guess the flavours. You may be surprised how like the dessert they actually taste!

Other things that have caught my eye from the range (family & friends take note :-) are tiddly caramel penguins & mulled wine cherries but really there's just too much to choose from.
I did think it a little bit mean just to write a post about me getting to try some delicious chocolate, so I have an early Christmas treat for you! I have another box of the Winter Dessert chocolates to giveaway to one lucky reader. All you have to do is take a look at the full Hotel Chocolat Christmas range & leave a comment telling me which treat you would like to find under the tree this Christmas.

You can also email your entry to rebeccabakescakes@hotmail.co.uk

Entries need to be in by 23:59 on Wednesday 7th December 2011. Winner will be chosen at random with the help of a random number generator!

Good Luck! Rebecca x

If you want to find out more about Hotel Chocolat you can follow them on Facebook & Twitter

All pictures courtesy of Hotel Chocolat

20 October 2011

Chocolate week, baking week, is there any week that isn't a week, cookies!

Hello. You may remember a few weeks back was National Cupcake Week, in honour of which I created some peanut butter & jam cupcakes. Well I posted a piccie of said cupcakes on the Baking Mad Facebook page & ended up winning a pack of orange flavour buttons which I probably got a bit too excited about. If you're not a fan already I'd recommend joining, they often run giveaways & competitions. The Baking Mad website is also worth a look for all things related to baking & cupcake making!

So they are the inspiration for this weeks recipe, which I created to celebrate both Chocolate Week (last week) & Baking Week (this week) It never ceases to amaze me the number of 'weeks' we actually have, although I feel there's a critical one missing. I think we absolutely have to have a 'National Eat Crisps Week' where every meal has to be accompanied by a potato based snack! Who's with me??

The orange buttons are made from cocoa butter & made a great cookie topping, I also added some natural orange essence to the cookie dough mixture to create the perfect chocolate orange cookie.

100g unsalted butter
140g caster sugar
1 egg
140g SR flour
25g cocoa powder
2tsps natural orange essence
Pack of Silver Spoon orange flavour buttons

1. Cream the butter & sugar until light & fluffy, then beat in the egg gradually until you have a lovely smooth batter.

2. Sift in the flour & cocoa powder & fold together, finally add the orange essence.

3. Place small dollops of cookie dough onto a baking sheet, add some buttons to the top. Don't worry it they look a bit squished, they'll spread out when the cook.

4. Bake in the oven at 180c/GM4 for around 10-12 minutes. Leave to cool completely & crisp up.

Looking at the finished article they would probably be quite good for a Halloween party if you were that way inclined? As my friend pointed out, there were a few of them that ended up looking like something out of the Mighty Boosh, google it, you'll see! Enjoy, Rebecca x

9 February 2011

Forever Nigella #2 - Chocolate Love Buns

I'm not normally one to get swept away with the whole Valentines Day hype, but this year I've decided to jump on the bandwagon & create a Valentines Day treat for the second round of the Forever Nigella blogging challenge hosted by Maison Cupcake

This months theme is Seduced by Chocolate & I did wonder if I could resubmit last months recipe. In case you missed it, it was Devils Food Cake & was about as chocolaty you could get! But that would be cheating & instead I made a variation on a recipe that was featured in Nigella's Feast book (my favourite!)

Love Buns seemed quite apt for Valentines Day, I've adapted them into Chocolate Love Buns, topping them with pink frosting & a dusting of shimmer!

Click here to view Nigella's original recipe. For my variation I simply added 25g cocoa powder to the cake mix & a few drop of natural red food colouring to the frosting along with the vanilla essence. I love these & trust me they're not half as sweet as they look. The cake is deliciously soft & the frosting is so fluffy & light it could almost float off the top of the cake!


Hope you enjoy my Love Buns (makes me giggle like a 8 year old every time!) & maybe even make some for your Love Bunny this Valentines Day, beats shop bought any day!


Happy Valentines Day, Rebecca x

5 January 2011

Week 51 - Devils Food Cake

Happy new year everyone, hope you all had a lovely weekend & are looking forward to 2011. It seems a bit strange that as most people seem to be talking about fresh new challenges for the year ahead & new years resolutions, I'm about to bring my year long baking challenge to a close. Feel a little bit behind with things!

So this week I am baking to take part in a blogging event called Forever Nigella. I got a copy of her new cookbook, Kitchen, for Christmas so I thought this was a perfect opportunity to crack it open! I have quite a collection of her books & if I'm honest like to imagine myself as a bit of a Nigella in the kitchen. The reality is I don't look half as glamorous & usually have flour in my hair! Here's me at Christmas in my Mum's kitchen trying to do my best Nigella impression, complete with posh pinny & gin & tonic in hand!

The Forever Nigella event is hosted by Maison Cupcake, visit her blog to find out more details, but the idea is basically to pay homage to the Domestic Goddess by making & blogging about her recipes. Each month there will be a different theme, this month it's Seasonal Sensations, so there's loads to choose from. I've chosen to make Devils Food Cake as an indulgent treat to help ease me back into the work routine. I always find that post-Christmas can be a bit tricky, it's cold, daylight is in short supply so it's a good excuse for comfort food. I know everyone seems to be on a diet or detox, but lets face it, life's too short, so lets us eat cake! I'm not able to publish the actual recipe on my blog unfortunately, so here's a link to it as featured on the BBC Food website. Devils Food Cake was featured in episode 12 of Nigella Kitchen on BBC1


This is the most delicious, indulgent chocolate cake I have ever made & I love it as it's not sickly sweet as some milk chocolate cakes can be. My only challenge now is how on earth do I get it off the cake stand & into a tin?? Oh well might just have to eat it...can't have it going stale! See you next week for the Rebecca Bakes Cakes 52nd week finale! Rebecca x

8 December 2010

Week 47 - Florentines

Blimey it's cold! Hope you're managing to stay warm & haven't been snowed in, we've had rather pathetic flurry in the Royal Borough so sadly no snow days for me :-( I'm very excited that the Windsor Ice Rink returns this year! It's in Alexandra Gardens in the centre of Windsor, right by the banks of the river, it's a beautiful setting & sure to make you feel in the Christmas spirit. It opens this weekend, take a look at the website for opening times & booking information.

So I'm launching into full on foodie prep for the festive season & this weeks recipe has become a bit of an annual tradition. I really like making foodie gifts at Christmas & these are perfect to take to dinner or a party as a thank you gift. Last year I also made Santa cookies for my friends at work, the idea was to leave them for Santa on Christmas Eve, but if I'm honest I don't think many of them made it out of the office! Florentines are really easy to prepare, but if I'm honest once they come out of the oven they are a little fiddly to finish. But have patience & it'll be well worth it in the end!

150g butter
150g light brown sugar
100g flaked almonds
50g chopped nuts
40g mixed peel
100g glace cherries
100g raisins
150g dark chocolate, melted

1. Melt the butter in a pan, stir in the sugar & heat gently until it dissolves & just starts to bubble. Take off the heat & stir in all the other ingredients.

2. Line a baking sheet with baking paper & place small dollops of the mixture, leaving space in between for them to spread. Bake in the oven at 180c/GM4 for 8-10 minutes.

3. Lift out the oven, slide the paper off onto a wire rack for the florentines to cool. Line the tray with fresh paper & spoon out the next batch.

4. Once all cooked & completely cooled, carefully peel them off the paper, you might need to slide a knife underneath to help. Place them face down on the paper & cover the bottom with the melted chocolate & leave to set.

When the chocolate was completely set I packed them into sellophane gift bag. I bought mine from Morrisons supermarket, but did also notice them in Sainsburys. They were around £2 for a pack of 10, with ribbons & I just added a simple silver gift tag. My batch made 28 florentines, but you could easily half or double the quantities depending on how many you need. Enjoy! Next week I think I'll be trying my hand at some baking construction, until then, Rebecca x


1 December 2010

Week 46 - Red Velvet Cupcakes

Pinch & a punch for the first of the month, it's December so the Christmas countdown starts today! The tree will be going up at the weekend & I'm really looking forward to the party season. We're starting early with our work do tomorrow evening, outfit is sorted, nails are done, just need to work out how exactly you use a velcro roller & I'm ready to go. I bought a gorgeous new pair of heels which are pretty much sky scrapers, even by my standards. I've been off work today so thought I'd better try them out, you should have seen me, teetering round the house in my jammies & a pair of 4 inch heels, actually it's probably best you didn't see me! They're remarkably comfy, but I think as back up I should try & get a pair of those fold able ballet pumps to stick in my handbag...I have a feeling I might have to abandon the stilts at some point!

So entries to my second giveaway closed yesterday & thanks to the random number generator I'm happy to announce the Kel of Writings, Ramblings & Reviews is my lucky winner! Well done Kel, I hope you like the mugs, given the Arctic conditions I hope you enjoy using them to warm up with a nice hot brew? With only 6 weeks left to go in my baking challenge, I'm hoping I can bring you a finale giveaway soon...watch this space.

This weeks recipe is something that I've wanted to try for quite some time & comes from the very beautiful Hummingbird Bakery Cookbook. The red velvet is created by mixing together red food colouring with cocoa powder & vanilla essence to form a paste. Word of advice, do not mistake this as melted chocolate & lick the spoon...eh Mum? I baked this week at my Mum's house & before I could stop her she did exactly that, looked like she'd gone all vampire like & had to spend 20 minutes brushing her teeth!

For the cakes
60g butter
150g caster sugar
1 egg
10g cocoa powder
20ml red food colouring
1/2tsp vanilla essence
120ml whole milk
150g plain flour
1/2tsp salt
1/2tsp bicarbonate of soda
1 1/2tsps white wine vinegar

For the frosting
300g icing sugar
50g butter
125g cream cheese

1. Beat together the butter & sugar until light & fluffy, then beat in the egg. Mix together the cocoa powder, food colouring & vanilla until you have a smooth paste. Add this to the butter mixture & beat well until all combined.

2. With the mixer on a slow speed, beat in half the milk, then half the flour. Repeat with the remaining ingredients until you have a lovely smooth mixture. Finally add the salt, bicarb & vinegar, then turn up the mixer & beat well for a couple of minutes.

3. Line a 12 whole bun tin with paper cases & fill each about 3/4 full with mixture. Bake in the oven at 170c/GM3 for around 20-25 minutes until well risen & springy to the touch. Leave to cool in the tin.

4. To make the frosting, beat the icing sugar & butter together, then add the cream cheese & beat for around 5 minutes until fluffy, spread this frosting all over the top of the cakes when cool.


These are really delicious & as the name suggests, have a lovely velvety texture! Have a good week, I'm giving my Christmas cake it's final drink of brandy before tackling the decorations! See ya, Rebecca x

10 November 2010

Week 43 - Viennese Biscuits

Afternoon folks, I've had a day off today so I'm feeling all relaxed & am writing this with a cup of tea & one of this weeks biccies! Can you believe that I'm in to the final 10 weeks of my blogging challenge. It's gone so fast, but I'm wondering what to do with all the recipes I've tried over the year? A book maybe? :-) For now I have to concentrate on the final 9 recipes, if anyone has any suggestions please let me know...

This week I had some good news, the blog has been nominated in the Dorset Cereals Little Blog Awards! It's a monthly award & voting takes place throughout November. So if you like my blog & enjoy reading then please vote & spread the word. You could also be in with a chance of winning a delicious Dorset Cereals goodie bag too! Click here to vote or follow the link on the right, thank you x

I thought we'd go all continental like this week with a Viennese Biscuit, they were meant to be Viennese Fingers but it didn't quite go to plan! These were really easy to make, they're pretty much a very short shortbread & this recipe came from my vintage Be-Ro book. Once you've made the mixture, you are meant to put it into a piping bag with a rosette nozzle & pipe 6cm strips of mixture onto a baking tray. Well I have a piping gun & could not for the life of me squeeze anything out of it as the mixture was so stiff, so I popped it in the microwave for 10 seconds! That seemed to do the trick, but rather than keep their traditional spiky shape, as soon as I put them in the oven they flopped into a splat!

150g butter
50g caster sugar
150g self raising flour
Few drops vanilla essence
100g plain chocolate

1. Cream together the butter & sugar, make sure it's really well beaten & soft.

2. Stir in the flour & vanilla. Scoop it into a piping bag or gun & pipe 6cm strips onto a baking tray lined with baking paper. Bake in the oven at 160c/GM3 for 15 minutes until just golden.

3. Leave to cool & crisp up, then melt the chocolate & dip one end of each biscuit.

So they may not have the shape of the shop bought ones, but they are delicious none the less. Let me know if or how you managed to get yours to keep their shape! Have a good week, don't forget to vote, Rebecca x

28 October 2010

Week 41 - Chocolate Raspberry Muffins

Hello, how are we all this week? I can't believe how quickly the weeks are whizzing by & to be honest I've been so busy with the day job there's nothing much exciting been happening! So this week I've decided to stay true to the cake & just share this weeks recipe with you. Oh & by way of a public service announcement, don't forget the clocks go back this Sunday, an extra hour in bed...yey!!

125g butter
200g caster sugar
2 eggs
175g plain flour
1tsp baking powder
1tsp bicarbonate of soda
35g cocoa powder
250ml greek yoghurt
100g raspberries (fresh or frozen)

1. Melt the butter, beat in the sugar then the eggs, finally stir in the yoghurt.

2. Sift in the flour, baking powder, bicarb & cocoa powder & fold the ingredients together.

3. Line a bun tin with paper cases & spoon in the mixture. Finally sprinkle the raspberries over the top of each muffin & bake in the oven at 180c/GM4 for around 20 minutes. Leave to cool in the tin for a few minutes, then lift out onto a rack.

I think these are delicious, the sharp raspberries really balance the sweet chocolate & the yoghurt gives them a lovely soft texture. Hope you enjoy them! Don't spook yourselves too much this halloween & I'll see you next week with a bonfire night treat, not strictly cake, but something I've always wanted to have a go at making! Until then, Rebecca x

15 September 2010

Week 35 - Mars Bar Cupcakes

Evening! I'm back from Belgium just long enough to rustle up this weeks recipe. I also bring good news! You may remember a while back I created a recipe for Malteser Cookies for a competition that was being run by MyDish. Well sadly I didn't win, so no shiny new Kitchen Aid mixer for me, but I was a runner up! That means I have a parcel of chocolate goodies heading my way...as if I didn't have enough calories to deal with every week :-) Here's the link to the original post, it's a dead simple recipe to make, so why not have a go yourself?


You may have noticed that this week is National Cupcake Week (it's also Scottish Food Fortnight & Organic Food Fortnight!), so it only seemed right to make some sort of cupcake. Sweeties have often been a source of inspiration for recipes so this week I'm paying homage to the good old Mars Bar. I found them great to bake with, the nougat bit stays soft, but the caramel turns into lovely chewy toffee. Yum!


For the cakes
60g butter
100g caster sugar
1 egg
Few drops of vanilla essence
300g plain flour
1tsp baking powder
1tsp bicarbonate of soda
100-150ml milk
2 Mars Bar Duo's chopped into small chunks

For the topping
80g plain chocolate
2tbsp icing sugar
Dash of milk
1 bag Mars Planets

1. Melt the butter, stir in the sugar, then beat in the egg. Fold in the flour, then add the milk a little at a time until you get a dropping consistency. Finally stir in the chopped up Mars Bars.

2. Line a 12 hole bun tin with paper cases & spoon in the mixture. I made 18 cakes, so had to bake 2 batches. Bake in the oven at 180c/GM5 for around 10-12 minutes. Lift out, leave to cool for a minute, then transfer to a rack.

3. To make the topping melt the chocolate, then stir in the icing sugar adding a little milk to make it smooth. Drizzle over the top of each cake, then top it off with a Mars Planet sweet.

Hope you enjoy what's left of National Cupcake Week, it's a good excuse to eat cake I guess! I'm off to Holland again next week & will be on a mission to get a traditional recipe for Dutch Apple Cake from one of my colleagues. Till next week, Happy Baking, Rebecca x

28 July 2010

Week 28 - Whoopie Pies

So Whoopie Pies are apparently the new cupcake & in my quest to stay at the cutting edge of baking trends *ahem* I've had a crack at making them this week! By the wonders of the internet I have discovered the following things about Whoopie Pies...

1. They originated in the Pennsylvanian Amish community

2. Amish wives would bake them & put them in their husbands lunchboxes, when they discovered the treats they would shout WHOOPIE (I can't imagine a Brit husband getting quite so excited about finding a custard cream!?)

3. The tradition of using Marshmallow Fluff for the filling came from the manufacturers of Fluff featuring it in a Whoopie Pie recipe included in a 1930's cookbook called Yummy Book (I'd love to get hold of a copy of that!)

When I was researching what should go into a Whoopie Pie, I got a bit baffled by all the different options. This recipe was kindly sent to me by Roddas Cornish Clotted Cream & they have given them a distinctly Cornish twist, suggesting you fill them with their cream. I think that sounds like a great suggestion, but for my first attempt I'm staying true to the original & have chosen to make the traditional fluff filling. This part of the recipe is taken from the Marshmallow Fluff website. I chose to use Strawberry Fluff as I thought it would complement the chocolate & the fact it's the most amazing shade of pink!

For the cakes
100g unsalted butter
185g muscovado sugar
1 egg
300g plain flour
1tsp baking powder
1tsp bicarbonate of soda
1tsp vanilla extract
100-150ml milk

For the filling
1/2 jar of marshmallow fluff
130g icing sugar
100g butter
Dash of milk

1. Cream together the butter & sugar, then beat in the egg & vanilla.

2. Sift together all the dry ingredients, then add about half to the butter mixture along with about half the milk, mix well. Add the remaining half of the flour etc & enough milk to make a smooth mixture of dropping consistency.

3. Grease a baking sheet & place on small dollops of the mixture, leaving plenty of space in between for them to expand. I made 24 individual cakes from 1 batch. Bake in the oven at 180c/GM5 for 12-15 minutes until well risen & springy to the touch. Place onto a wire rack to cool completely.

4. To make the filling, cream together the butter & icing sugar, adding a little dash of milk to help it along, then beat in the Marshmallow Fluff until all combined. Match up the cakes into pairs, then use the fluffy filling to sandwich them together. I also added a drizzle of melted dark chocolate to the top!

These are quite possibly the most amazing thing ever! Delicious! They are pretty large, so unless you're feeling hungry I'd suggest sharing one with a friend over a glass of ice cold milk! Hope you enjoy making your own Whoopie *sniggers* I'll hopefully see you next week, I've booked a last minute trip away, so I'm hoping the technology will mean I can keep my unbroken record for a 29th week...until then, Rebecca x

20 July 2010

Week 27 - Daim Bar Birthday Brownies

Good news! I have a new fridge, so I'm no longer having to survive on tinned food & frozen veg. Not that there's anything wrong with tinned food & frozen veg, but not being able to have milk for a cup of tea was sure to test any ones patience! All in all it's been a much calmer week in the kitchen, although I swear my toaster is still trying to kill me :-)

Now we're over the half way point of my blogging challenge, it got me thinking back to when I first started & I went back to read some of my early posts. It's made me realise how much I enjoy writing each week & receiving comments about my creations. (The baking's not been too bad either!) But it also made me feel a little sad to think what I might do when I reach week 52, do I just stop writing? Now I've released my inner writer I want to keep on going! Maybe I need to think of a new foodie challenge to embark on, but maybe one that is less calorific! For now though I'm happy I've got another 25 weeks to go...so bring on this weeks recipe.

I created this recipe for my Mum as it's her birthday this week. She has a super sweet tooth so I thought brownies would hit the spot! Rather than using the traditional walnuts, I thought I'd have a go with bashed up Dime bars. Sorry, Daim bars! (Yes I am old enough to remember when Snickers were Marathons, Starburst were Opal Fruits & Daim Bars were Dime Bars...armadillos!) It gives them a lovely almondy crunch & the sweetness offsets the bitterness of the dark chocolate. I thought of this after making the Malteser Cookies a couple of weeks back, sweeties are a good source of recipe inspiration for me!

50g plain chocolate
65g butter
175g caster sugar
2 eggs
Few drops vanilla essence
50g plain flour
1/2tsp baking powder
3 Daim bars bashed up

1. Melt together the chocolate, butter & sugar in a large bowl. Beat in the eggs & vanilla, then finally fold in the flour, baking powder & Daim bar pieces.

2. Line a baking tin approx 15cm square with either baking parchment (just don't set fire to it like I did!) or foil to stop the brownies sticking. Pour in the mixture & bake in the oven at 180c/GM4 for around 30-35 minutes until the top just starts to crack.

3 Leave to cool in the tin, then lift out & cut into squares.

So there you have it, Birthday Brownies (sparkler optional!) Happy Birthday Mum! Hope you like them & you enjoy our day in the big city being ladies what lunch xx

See you all next week, Rebecca x

6 July 2010

Week 25 - Malteser Cookies

Hey hey, I'm back from my weekend camping feeling very chilled & ready to bake some more! We had fab weather in the New Forest & amazingly the campsite sold bags of ice, so panic over, there was no problem keeping the Rose chilled. We did go horse riding & yes I did announce to the rather confused group, 'I'm on a horse!' It seems getting off a horse is harder than getting on though & I performed the most ungraceful dismount, catching my back leg on the saddle & pretty much coming off head first. It's ok, I don't think anyone noticed! I also didn't realise there were wild ponies in the forest? It's a bit odd how they just roam around the place, one came right up to us & practically sat on our picnic blanket, we did offer him a beer but he wasn't that interested & wandered off again. I did enjoy camping & had a lovely time, but I admit I was happy to be back in my bed!

So next week marks a milestone for the blog, I hit the half way point in the baking challenge. It's been a lot of fun baking & writing each week, as well of course being able to share the fruits of my labour. I've had such lovely support & encouragement from everyone, I wanted to do something to say thank you. So this Friday I'm hosting the first ever Rebecca Bakes Cakes tea party! I have a special 1/2 birthday cake planned, as well as lots of other sweet treats & probably not an insignificant quantity of Pimms. If you're in the area let me know, pop in & say hi! Full report next week...

So on to this weeks recipe & it's something I've created for a competition that's running on mydish.co.uk The challenge is to create a recipe using Maltesers. Now putting them in cookies may not seem like the most creative use of Maltesers, but I've never come across it before & to be honest it was a bit of a gamble as I didn't know how they'd hold up in the oven? Simple, but effective I think!

55g butter
120g soft brown sugar
1 egg
Few drops of vanilla essence
140g plain flour
1/2tsp bicarbonate of soda
135g Maltesers (bashed up a bit!)

1. Cream together the butter & sugar, then beat in the egg & vanilla essence

2. Stir in the flour & bicarb, then finally the Maltesers. Spoon dollops of the mixture onto a baking tray, leaving space for them to spread, I got 12 cookies from a batch. Bake in the oven at 180c/GM5 for 12-15 minutes. Leave to cool on a wire rack

I'm quite chuffed with the outcome, the Maltesers go even crunchier in the oven, so you get a delicious cookie with little bites of malty loveliness! I think to make them even better, next time I'd also add a handful of mini marshmallows. The competition closes at the end of the month so we'll have to wait & see how my cookies compare?

Ooo...before I forget, does anyone know where I can find Marshmallow Fluff in London? I'm desperate to try Whoopie Pies, but this is a vital ingredient I'm missing. Well time to say goodbye for another week, take care, Rebecca x

8 June 2010

Week 21 - Black Forest Gateau

Aloha cakies! How are you all? I'm so excited, I'm off to the south coast this weekend to attempt to learn to surf! I've never even so much as body boarded before & have a serious case of wet suit fear...I mean how on earth do you get yourself into one? Thankfully I'm a fairly strong swimmer so I'm hoping I won't drown myself, but I think there's probably only an outside chance of me actually getting upright on a surf board. But you never know, I might take to it like a duck to water & transform myself into a surf babe worthy of a part in Blue Crush! It's going to be a lot of fun with a packed schedule, we've got surf lessons & yoga, think I might need another holiday to recover!

So, it's been a while since I've baked what I'd call a proper cake, so I thought I'd have a crack at a 70's classic, Black Forest Gateau. It ended up being a bit of a feat of engineering to construct, but I hope you'll agree it looks impressive (if not a little hap-hazard!). I think the original recipes suggested using tinned cherries, but I really struggled to find them. Instead I made my own cherry compote, it takes a bit of time but is well worth the effort. I didn't want to buy Kirsch so sneaked in a little bit of brandy to give it a kick!

For the cakes
225g butter
225g sugar
4 eggs
225g plain flour
25g cocoa
2 tsp baking powder

For the filling
300g cherries
100g soft brown sugar
50ml brandy (optional)
50ml water
300ml whipping cream

1. Cream together the butter& sugar, then beat in the eggs until light & fluffy. Sieve in the flour, cocoa & baking powder, fold together until all combined. Grease 2 sandwich tins & divide the mixture between them. Bake in the oven at 190c/GM5 for around 20 minutes. Leave to cool in the tin, then tip out onto a rack.

2. Cut the cherries in half & remove the stones, this is a bit fiddly & you will end up with pink fingers! Keep a few fresh to decorate the top with. Put the stoned ones in a small pan with the sugar, water & brandy, give it a good stir. Put it on a gentle heat & bring it up to the boil. Simmer until the mixture has reduced by half & the liquid has thickened into a light syrup. Put to one side to cool.

3. Whip the cream until it forms soft peaks, then slice each of the cakes in half, I find it easiest to use the bread knife to do this. Now starts the construction! Place a base layer of cake, drizzle a little of the syrup over the top, then add a layer of cream, a scattering of cherries & another layer of cake. Repeat this pattern until you pop on the top, then add a final topping of cream & a few more fresh cherries to decorate.

This is a delicious gooey tower of chocolate, cherry & cream. For the full effect I feel like I should be presenting it on a hostess trolley! Only problem is I'm wondering how I'm going to fit it into the fridge? Oh well, might just have to eat it instead! Maybe this could be the first in a series of Euro inspired cakes? Germany can't be the only one with a famous cake? Well for now, auf wiedersehen, wish me luck for surfing & I'll see you all next week. Take care, Rebecca x

1 June 2010

Week 20 - Rock Buns

Notice anything different about the blog this week? Yes, we've had a bit of a bank holiday makeover! The blogger template was great to get me going, but now I've found my feet a bit with this blogging malarkey I thought it was time for a new look. The design comes from a great site called www.yummylolly.com. It's run by a fab designer who has been kind enough to share her blog templates for free! I loved her designs & found it tough to pick a favourite, it's great, with this new look I feel like a proper blogger now!

This weeks recipe was a suggestion from Our New Life in the Country & it got me thinking back to some of my earliest memories of cooking in home economics at school. The first thing I think we ever cooked at middle school was potato pie. Now from what I remember 'pie' was used in the loosest sense of the word, we basically made mashed potato, tipped it into an oven dish & topped it with grated cheese! I feel sorry for my Mum & Dad who were probably made to eat it, having to make the appropriate noises of appreciation! I do also remember baking at school & have the battle scars to prove it. One week I came home from school with my arm wrapped in cling film after dropping a baking tray out the oven onto my arm. Unfortunately my clumsiness seems to have got worse with age & I'm still a bit of a liability in the kitchen!

I'm sure we made rock buns at school, the traditional ones with mixed peel & sultanas. But keeping with the makeover theme for this week, I thought I'd try a new more grown up version, see what you think?

100g butter
50g light brown sugar
1 egg
225g self raising flour
100g fudge
100g milk chocolate
Dash of milk

1. Cream together the butter & sugar, then beat in the egg until it's all light & fluffy

2. Chop both the fudge & chocolate into small chunks (or use chips instead), add them to the mixture along with the flour. Fold it all together until it combines to a stiff dough, use a little dash of milk to help it along if its a bit too dry

3. Line a baking tray with greaseproof paper & place on small dollops of the mixture leaving a gap to allow them to spread. I made 12 rock buns out of a batch

4. Bake in the oven at 200c/GM6 for 10 minutes until they have just started to brown on the top. Leave to cool completely, then peel them off the paper.

I'm really pleased with the result, the fudgy bits on the top have melted into delicious caramel gooeyness & the cake itself is lovely & crumbly! I hope you like the new twist on an old classic? However if you're a bit of a traditionalist & want to stick to the classic, then simply substitute the fudge & chocolate for 150g of mixed fruit & a good pinch of mixed spice. Right I'm off to research food processors, managed to break mine in the process of this weeks baking...what was that about liability in the kitchen?? Till next week, Rebecca x

5 May 2010

Week 16 - Millionaire's Shortbread

Hello, hope you all enjoyed the long weekend? I managed to time it perfectly & take advantage of the 5 hours of sunshine we did actually get! I completed my final long training walk on Saturday, 18 miles in 4.5 hours. So that's it, training done, I'm ready for the Moonwalk & I can't wait for the 15th May. I'm just hoping my feet heal in time, I'm still having problems with blisters & there doesn't seem to be enough compeed plasters in the world to help. I've even taken to padding around the office barefoot to avoid shoes making them worse! If anyone has any tried & tested methods to fix blisters, please please let me know, I've only got 10 days to go.

This weeks recipe is a request & one of my favourite sweet treats. I used to buy it ready made from the supermarket & always thought it would be really difficult to make at home? I came across this recipe in the Christmas edition of Olive magazine & thought I'd have a go! It's easier than you might think, it just takes a little time as you have to allow for cooling in between layers. That said, the result is amazing & I'll never go back to the shop bought stuff! Piccie will follow, my chocolate topping hadn't quite set yet!

Shortbread
50g caster sugar
150g butter
200g flour

Caramel

225g caster sugar
142ml double cream
25g butter

Topping
200g dark chocolate
40g butter
60g white chocolate

1. Blitz together the flour, sugar & butter in a food processor until you get a soft dough. Line a tin approx 20cm square with baking paper, leaving an overhang to make it easy to lift out of the tin. Tip the dough into the tin & firmly press down so it's evenly spread. Chill for 10 minutes, then bake in the oven at 160c/GM4 for 35 minutes until golden brown. Leave it to cool completely in the tin

2. To make the caramel, place all the ingredients into a pan & over a gentle heat bring it up to the boil until the sugar has dissolved. Simmer rapidly for about 30 minutes, it's tricky to know when it's ready, but I'm told you should drop a blob of caramel into a glass of water, if it stays together, it's done!

3. Once the base is cool, pour the caramel over the top & leave it to cool completely. Melt the dark chocolate & butter together, then pour over the caramel. Leave to set, then melt the white chocolate & drizzle over the top. Once it's all set, you can use the paper to lift it out of the tin & cut it into chunks

There's something really satisfying about making Millionaire's Shortbread, maybe because of the time that goes into it! The request came from my boss, who is leaving us (temporarily) to have a baby. So, I hope you enjoy it Kerry & that baby makes a safe arrival in the not too distant future! I have also made an alternative cake to mark the occasion, but as that's a surprise for Friday, I'll tell you about that next week. Right cake done, it's on to bra decorating for the Moonwalk...it's a very creative week! Enjoy, Rebecca

p.s. I'm not really sure if anyone is still reading this? If you are, make yourself known please :-)

28 April 2010

Week 15 - Espresso Biscotti

Phew! Well I made it back from holiday, but I have to be honest I wasn't sure we would! We were pretty much the last flight to leave the country the day the volcano started to erupt, so we were lucky to get away in the first place. We had a lovely week in the Egyptian sun & then a bonus 4 days waiting for a flight home. Thankfully we didn't have to move hotels & we got upgraded to all inclusive, so it wasn't all that bad being stranded! But it's back to reality with a bump & straight back into work. It's also only just over 2 weeks away from my Moonwalk Marathon, yikes! The good news is the sun & sea has really helped to heal my feet, which were starting to wear themselves out, so I'm raring to go again & there's a daunting 20 miles planned for this weekend! Thank you to everyone for their support so far, there's still time to sponsor me if you would like to help Walk the Walk & the fantastic support they give to breast cancer charities all over the country.

You can find my sponsorship page at www.walkthewalkfundraising.org/rebecca_hodgson_mw

So, on to this weeks recipe & I thought I'd try creating a recipe using another of my fav Green & Blacks choccie bars. I've used the Espresso dark chocolate to create a delicious crunchy biscotti. The first time I made biscotti I was surprised at how easy it was, it's just a bit fiddly as you have to cook it twice. Apparently biscotti actually means twice baked in Italian? (Need an Italian to confirm that for me!) There are lots of different flavours you could try, almonds, dried fruit, chocolate whatever you like really. I think Espresso is a great variation & perfect with a cup of coffee!

250g plain flour
200g caster sugar
100g bar Green & Blacks Espresso chocolate chopped into small chunks
1 tsp baking powder
Pinch of salt
3 eggs
Few drops almond essence

1. In a large bowl, mix together the flour, sugar, baking powder, salt & chocolate chunks

2. Beat the eggs with the vanilla essence, then add a little at a time to the dry ingredients & mix until it's all combined into quite a stiff dough. If it's proving tricky you can always add a tiny dash of milk to help it along

3. Tip the dough out onto a floured surface & roll it into a sausage shape. I ended up making 2 sausages as it made it a bit easier to handle! Place them onto a baking sheet lined with parchment & bake in the oven at GM3/150c for 30 mins

4. Take them out the oven & leave to rest for 5 minutes. Then using a sharp knife slice the sausages on the diagonal, to make biscotti about 2cm thick. Place them back on the tray & pop into the oven for another 15 minutes. They'll still feel a little soft when you take them out the oven, but will crisp up when cool

So there you have it, delicious biscotti! I like to dunk mine in my coffee, Douwe Egberts coffee of course!! Enjoy, next weeks recipe is a request & it's going to be a goodie, see you then! Rebecca

30 March 2010

Week 11 - Easter Nests

Easter Greetings Chooky Eggs!

So it's almost the Easter weekend & if you're like me, you'll be looking forward to a few days off? Now I thought the start of BST signals the start of spring, light nights, sunny evenings in the pub & a feeling of renewal, what with all the daffodillies & lammie mares! But we live in the UK, so lets not get carried away...what we've actually got is a severe weather warning for sleet & gale force winds hell bent on destroying the sturdiest of brollies! Hoary! Bring on the chocolate!

As well as
baking this week, I thought I'd go a bit arts & crafts & have a crack at decorating an egg. I haven't done this since my triumphant victory in the Alnwick Egg Competition in 1986 (aged 8) with my eggy Adam Ant! (Mum, why did you not take a picture?) Now it would seem my creativity when it comes to egg decorating has faded in the last 24 years. But I'm quite chuffed with my little egg, I've called her Henrietta!

So this weeks recipe is also Easter themed, although it's so easy to make I feel a bit of a fraud calling it baking...

150g milk chocolate
50g butter
3 shredded wheat
Mini eggs to decorate

1. Melt the butter & chocolate together in a large bowl & mix well. Crush the shredded wheat into the bowl & mix well, you might need to squish it together with the back of a spoon to get it all to combine

2. Spoon a generous dollop of the mixture into a paper case & press down gently, then add a couple of mini eggs to finish off

3. Let them set, you can either leave them in paper cases, but I like to take them out so you can get the full effect of the nest!

See told you it was simple! Hope you can take some time to make these over the long weekend & if anyone has a go at egg decorating, I'd love to see piccies. This weeks batch of goodies are going to a good cause, we're having a charity cake sale today at work, I'll let you know how much we raise next week. Enjoy the break, back next week, Rebecca

7 March 2010

Week 8 - Chocolate Ginger Cookies

I'm feeling a little delicate this week, so be nice cake mates. Training was completed as planned, but with hindsight, going out dancing in 4 inch heels the same day as completing a mammoth 11 mile walk was probably not my best decision ever! Now I have been known to abandon my shoes when out dancing, but on Saturday, for the first time ever, I was asked by security to put my shoes back on. Apparently dancing barefoot poses a health & safety risk! I would argue that me, slightly squiffy, dancing on 4 inch heels presents more of a risk than barefoot, but who am I to argue with a security professional? Needless to say my legs are a bit sore, although some treatment from my fab physio, Zdena on Monday means I should get out training again tomorrow. As my Mum would say, those mile won't walk themselves!

So, this weeks recipe is definitely one for chocolate lovers, sorry I realise this really isn't helping those of you who have given it up for Lent! I love Green & Blacks chocolate, so I've decided to create a series of recipes using some of their fab choccie bars. The first one uses the Dark Chocolate with Ginger, which is probably my favourite of the lot. The result is a really intense chocolate cookie that's lovely & chewy in the middle, perfect with a big mug of coffee!

100g butter
140g light brown sugar
1 egg
140g plain flour
25g cocoa powder
1/2 tsp bicarbonate of soda
1/2 tsp ground ginger
100g bar Green & Blacks Dark Chocolate with Ginger

1. Cream together the butter & sugar, then beat in the egg until you get a smooth mixture

2. Sift in the flour, cocoa powder, bicarb & ginger, then give it a good mix until it is all combined. You'll end up with quite a thick cookie dough

3. Next roughly chop the chocolate so you have small chunks, stir these in the the dough until they are fairly evenly spread

4. Spoon small dollops of the dough onto a baking sheet, they will spread, so give them some room, I got around 20 cookies out of my batch. Bake them in the oven at 180c/GM5 for around 10 minutes until they have lightly risen & the tops just start to crack

5. Leave to rest for a few minutes once out of the oven, then transfer to a wire rack. They might seem a little soft still, but will firm up once completely cooled

I think the next G&B recipe will use my second favourite bar, Milk Chocolate with Butterscotch. After that I'm just not sure, there's too many to choose from! If anyone has any requests, let me know. Next week, get your leg warmers & double denim at the ready, we're going back to the 80's with retro party cakes. Have a good week cookie monsters! Rebecca